


Google AdSense has rolled out a new family of ad formats called Page-level Ads to experiment with a new format of ads for website publishers.
AdSense Page-level Ads introduce two new formats of ads – anchor/overlay ads and vignettes. Both ad formats are mobile-only and will display only on mobile-optimized websites.

In this tutorial, I will walk you through steps that you can add to your WordPress website. I will also explain Page-level ads, introduce you to different types of page-level ads, and suggest ways you can implement and track them.
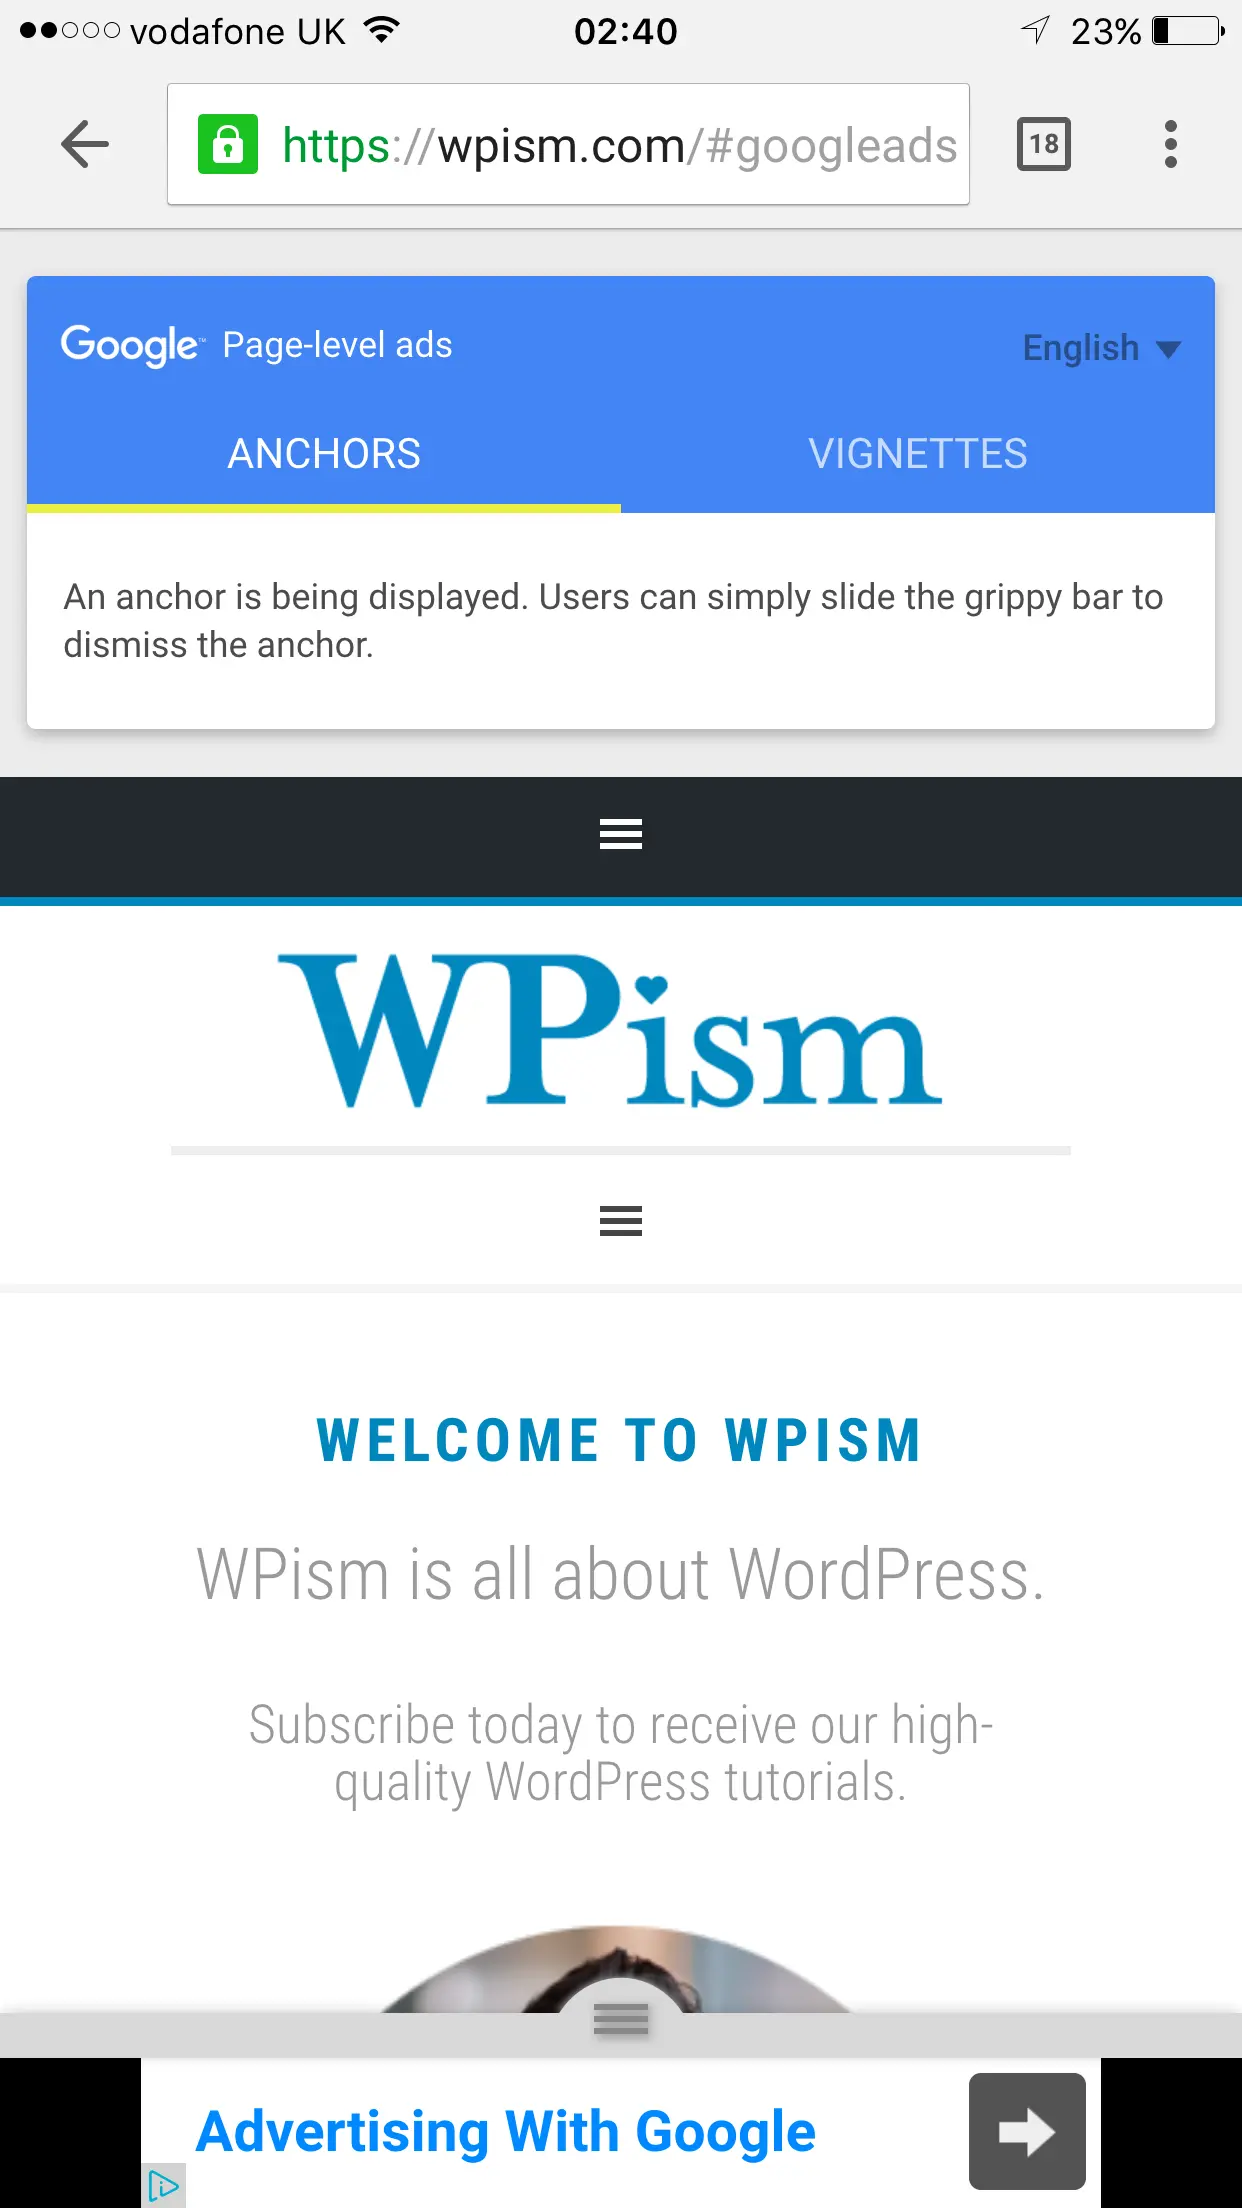
(If you use AdSense ads on your website, just navigate to www.yourwebsite.com/#googleads on a mobile device, and you might see a preview of page-level ads. You don’t need to be approved for such a format to see this!)
This is how one of the ads (Anchor/overlay ads) looks for WPism. See the “Advertising with Google” anchor ad at the bottom of the page.
A bit of a disclaimer first;
I was recently invited by the Google AdSense research team here in London headquarters for feedback on upcoming projects. I am not revealing anything from the private research session in this blog post.
About Page-level Ads
Page-level ads are the new format of AdSense advertisements available to publishers. The feature is still in beta and is available only to a limited number of AdSense publishers.
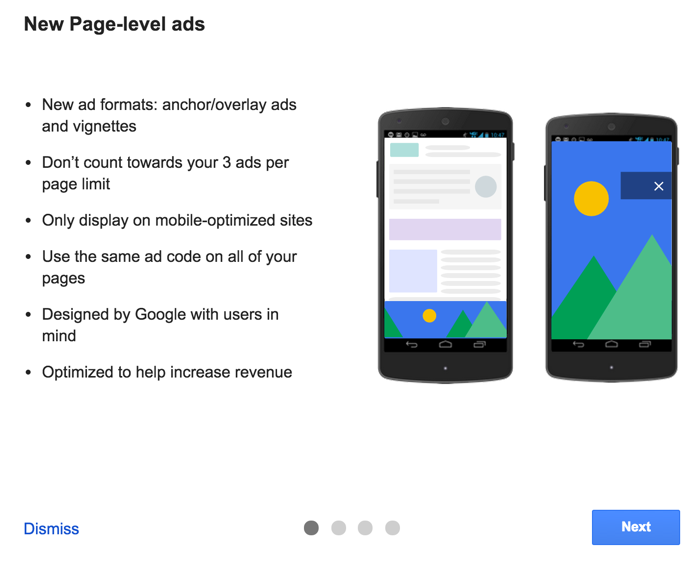
Google AdSense hasn’t announced these new Ad formats officially, but it has started rolling out to publishers and testing them.
AdSense, however, published about upcoming Anchor ads back in 2013, and their advertising platform, Google AdWords, announced the new ad formats for advertisers in September 2014.
Latest update: Page-level Ads are now available for all publishers.
With a rapid increase in mobile consumption, it’s become necessary for AdSense to introduce innovative Ads that highly convert on mobile devices. Responsive Ad Units, available to all AdSense publishers, are one of the most useful solutions available at present for mobile devices.
Page-level ads are completely built with Mobile in mind, and they definitely look promising to both advertisers and AdSense publishers.
Why add Page-level Ads?
So, you might be thinking about why you should add page-level ads if responsive ads are already working for you. Here are a few reasons why you might want to implement such ads.
- Page-Level ads are the new ad formats from Google Adsense, introduced to offer you an innovative way to monetize your content. It might help you to increase your earnings.
- Page-level ads don’t count towards your three ads per page policy limit of AdSense. This provides you with additional opportunities to increase your earnings from page views on mobile devices.
- Page-level ads are built with user experience in mind. They are easily dismissible and limited per user (more on that in ad types below).
- The ads are easy to implement, and you only need to place the same piece of code for the ads to be displayed on every page.
Similar to other ad formats, you can experiment and see if these ads work better for you and decide if you want to keep them activated.
With Page-level ads, AdSense has made two different types of ad formats available to the publishers.
1. Anchor/Overlay Ads – Google AdSense
Anchor ads work by allowing banner ad units to be anchored to the bottom of the mobile screen, staying there when your users scroll up or down the page (also mentioned in the AdSense blog post from 2013).

Anchor ads stick to the bottom of the user’s mobile screen and can be easily dismissed by the user.
After testing, here are a few situations that I found where Anchor Ads might not work,
- The viewport is not between 320 and 420 pixels wide.
- The device is not in portrait mode.
- The current browser is not supported.
2. Vignette Ads – Google Adsense
Vignette Ads cover the full mobile screen of the users. They are similar to overlay ads that you might have seen in native mobile (iOS or Android) apps.

Vignette Ads only appear between page loads on your website and can be easily skipped by the user at any time.
These ads do not appear when a user arrives on your website; rather, they are only displayed when a user is navigating to the next page on your website. This ensures that your user doesn’t have to wait to load the ad, and besides, they can easily skip it at any point.
Such behaviour of vignette ads is applied to maintain a good user experience.
For Vignette ads, here are a few situations that the Ad that might not be displayed;
- The viewport is not between 320 and 420 pixels wide.
- The device is not in portrait mode.
As you can see, unlike responsive ads, Page-level ads (both Anchors and Vignettes) don’t seem to work after a screen orientation change.
How to Add Page-level AdSense Ads in WordPress
Implementing Page-level Ad for website publishers or authors is as easy as adding any other Ad unit, but it needs to be placed in a unique location within your WordPress website.
Follow the instructions below to generate the required page-level AdSense code and add it to your WordPress.
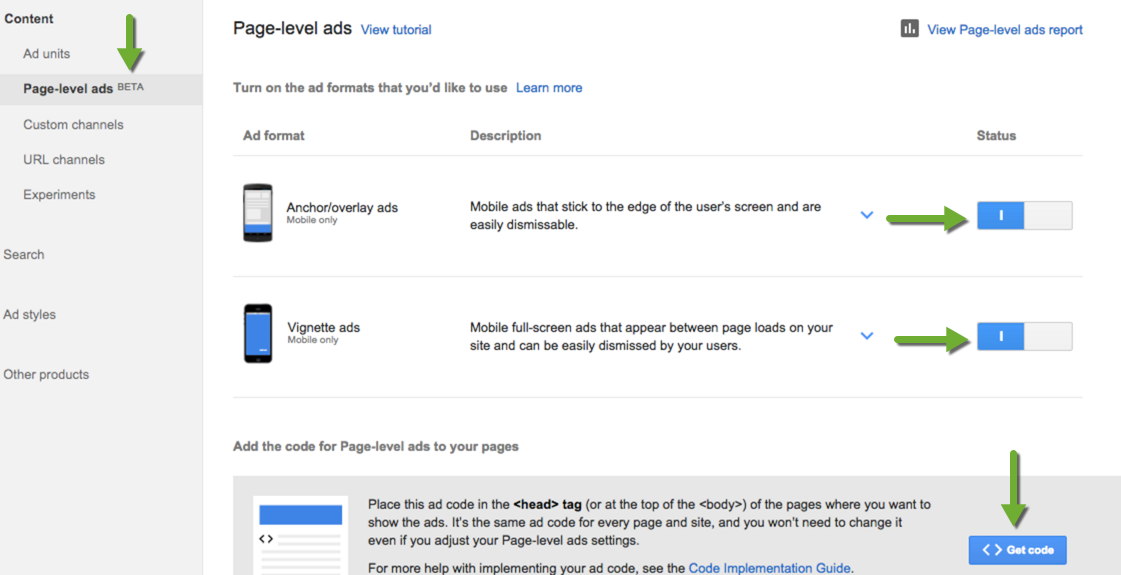
- Log in to your AdSense account to see if you are approved for the feature.
- Navigate to the My Ads tab on the top menu.
- Select Content > Page-level ads (again, you will only see this if you are approved for these ads).
- Turn on the page-level ad formats that you’d want to implement.
- Click on the Get code button to generate the required code for your AdSense account.
- Add the code in the head section of your WordPress (details below).
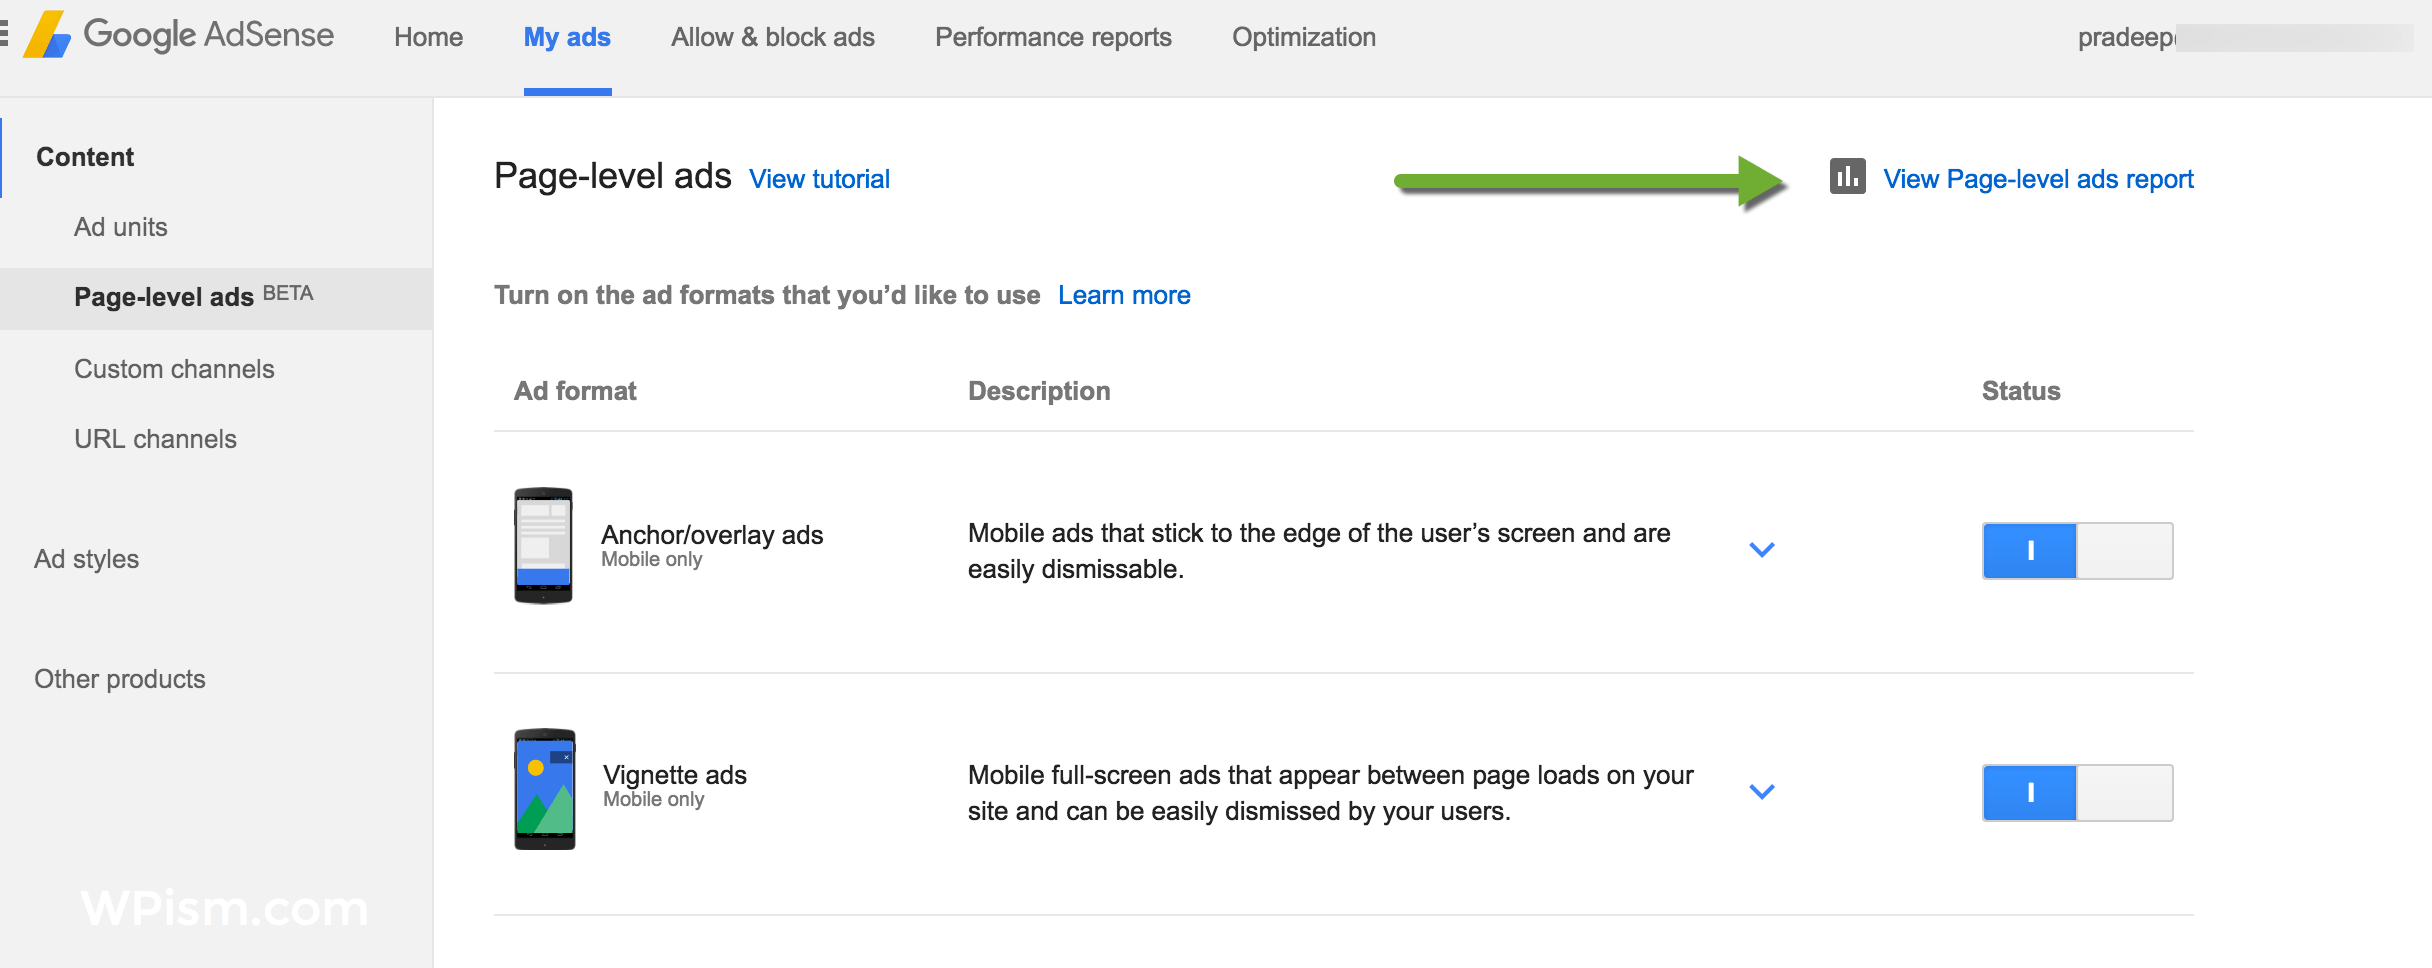
See the screenshot below for the above process.
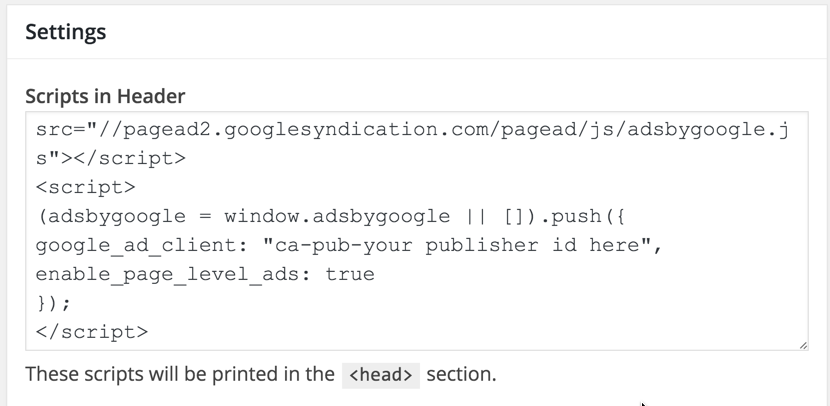
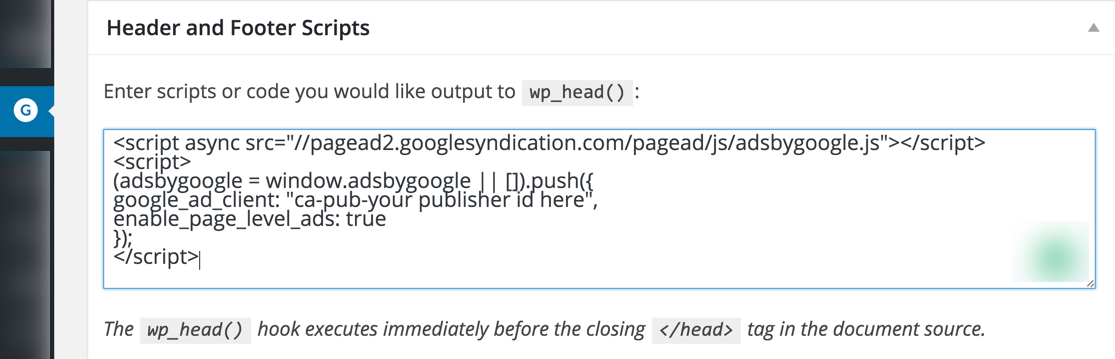
If you have turned on both the ad formats, this is what your AdSense code looks like;
Once you have your code ready, you will need to add it to the head section of your WordPress website. There are a few ways you can do this.
a. Add with a plugin: Install the Fluent Snippets Plugin that lets you add scripts without messing with your code.
– Go to Settings > Insert Headers and Footers.
– Add the above code to the “Scripts in Headers” section of the page and click on “save settings”.
b. For Pro users: If you are comfortable editing your theme, place the above code in the head section of your template. You can also place it on top of your opening body tag on pages to limit the display of the ads on certain pages.
c. For Genesis users: Theme frameworks like Genesis (what we use here at WPism) provide a built-in option to add codes to your header.
– From your Dashboard, navigate to Genesis > Theme Settings.
– Place the code in the first box under the Header and Footer Scripts.
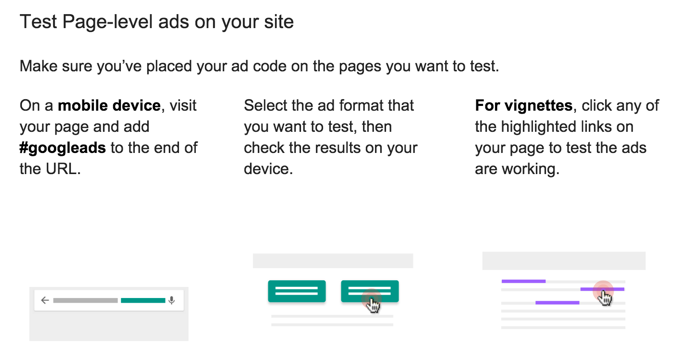
Test Page-level Ads
After adding the code, go through the recommended steps to see if you have implemented the code correctly.
Check Page-level Ads Performance Reports
Now that you have added the page-level ads code to your website, you might want to check their performance.
You can easily track the performance of your Page-level ads by viewing the Ad behaviour report from the Performance reports tab.
- From your AdSense dashboard, access the Performance Reports > Report Type > Ad behaviour.
- Under the Ad behaviour table, you will find page-level ad figures reported under “Anchor/overlays” and “Vignettes” labels.
(Adsense TOS doesn’t allow displaying/sharing the figures from this report)
The easiest way to get on the performance reports page (while this feature is still in beta) is by using the link on the Page-level ads configuration page under the My ads tab.
See the screenshot below to see the link to “view Page-level ads report” as shown on the page.
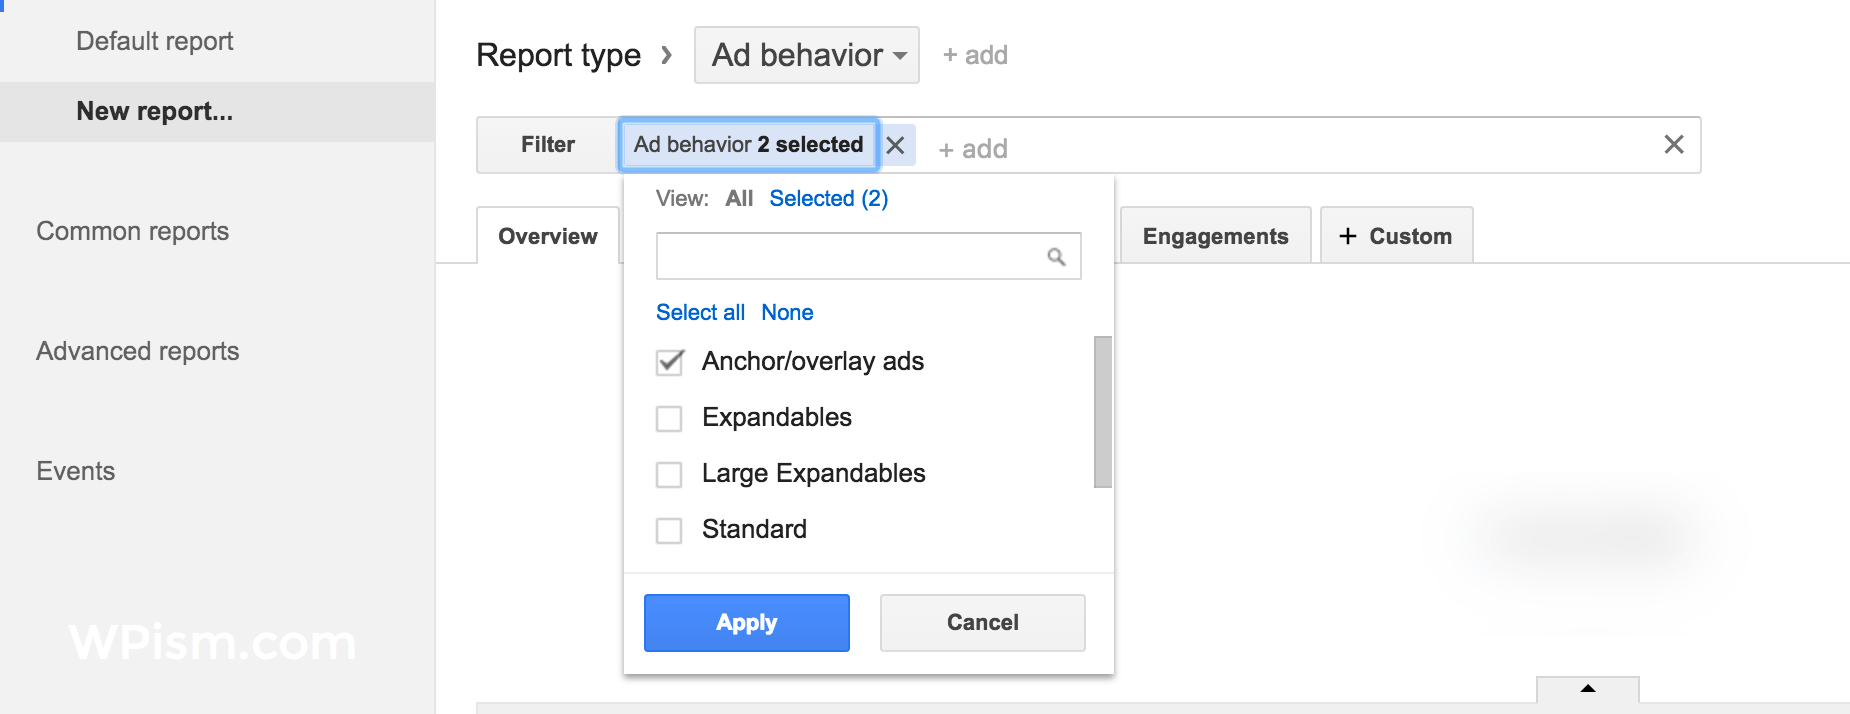
This should take you to a new report type page with Anchor/overlay ads selected.
For DoubleClick by Google Users
If you use DoubleClick Ad Exchange by Google to manage your ads inventory, here’s how you can check your ads performance report.
- Navigate to the Query Tool tab from the main Ad Exchange bar.
- Define your query.
- Select the Inventory Segments dimension family to report on tags or channels.
- Use the tags or channel IDs in the report to identify Page-level ads.
Preparing for Page-level Ads
If you don’t have access to Page-level ads, here’s what you can do to prepare your website.
Wait until you Get access to Page-level ads
You will need to wait until the ad formats are available in your AdSense publisher dashboard. There’s no way as of now to request manual access to the ad formats.
Google Adsense has been working on this for a while now (as you can see with the initial announcement in 2013), and it will surely roll out of beta very soon.
Make sure you have a Mobile-Friendly Website
This might be the obvious requirement for page-level AdSense ads to work on your website. Your WordPress website needs to be optimized for mobile devices. The best way to do is to choose responsive WordPress themes for your website/blog.
Additionally, you can use the Google Developers Mobile friendly tool to see if your website passes the mobile-friendly test.
Enter your URL in the test box, and the tool will analyze to see if your website is mobile-friendly. It will show an awesome green banner along with the mobile preview of your website.
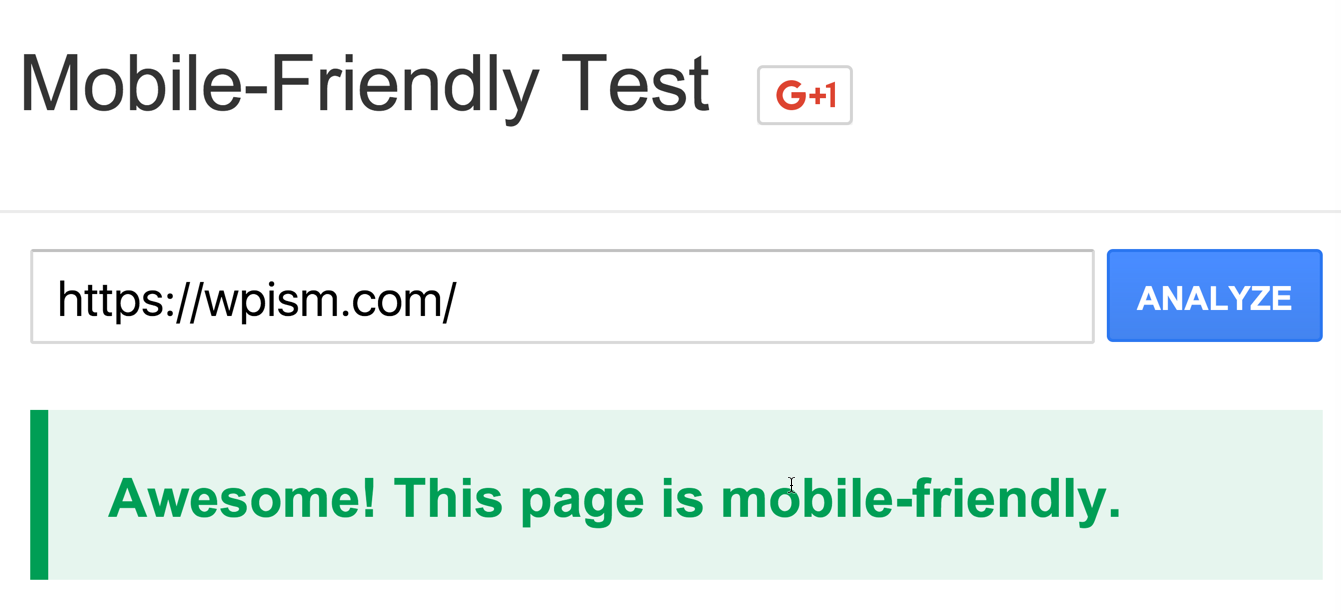
Make sure to check out the detailed guide on Mobile Friendly websites from Google to make your website mobile-friendly if it doesn’t pass the test.
Share your experience with Page-level Ads
Have you implemented these new page-level ads on your website? Have you seen any significant changes in your earnings?
Feel free to share your experience with the ads and how they are performing on your website.
I hope the tutorial helped you to familiarise yourself and implement Page-level ads for your website. You can always leave a comment below if I can be of any help to you.
Latest update: Google has rolled out the Page-level ads out of its testing mode and should be available to everyone now.
Here’s the video linked from the Adsense dashboard introducing the Adsense next-generation Page-level ads.
Looking for more tips and tutorials on making the most out of Google Adsense?
Subscribe to WPism as we cover several topics on Adsense, helping you learn how to optimize and make money with Adsense ads from your WordPress blog.
