Follow this complete beginner’s guide to learn how to start a blog from scratch and start blogging today using the most popular platform.
Starting a blog is really easy. You should be able to set up everything and get a brand new blog within the next 10 minutes following this detailed blogging guide.
We’re a reader-supported publisher. When you buy through links on our site, we may earn an affiliate commission.
Summary – How to start a Blog?
If you are in a hurry and want to skip the detailed steps of starting a blog or simply want to skim through the main steps, here’s a summary of the main steps on how to start a blog within the next 10 minutes.
- Sign up for WordPress hosting with Bluehost.
- WordPress will be automatically installed on your blog.
- Login to your new WordPress blog with the username and password.
- Install WordPress themes to change your blog design and install plugins for additional blog options.
Follow the process in the detailed guide below with each step of starting a blog explained in further detail.
In this guide, you will learn how to start a blog using WordPress, a popular blogging platform that powers almost 30% of entire websites in the world.
Additionally, we will use Bluehost, one of the officially recommended hosts by WordPress itself for blog hosting.
Here’re the main steps that we will go through in this quick guide that will get started with a blog completely from scratch.
- Steps for Starting a Blog
- Change Your Blog Design with WordPress Themes
- Configure Best Settings for your Blog SEO
- Extend Blog Functions with WordPress Plugins
- Start Blogging – Create Content – Posts / Pages
This guide is mostly action-oriented and provides you with a step-by-step process of starting a blog from a complete beginner’s perspective.
Easy Steps to Start a Blog
This is a comprehensive guide on how to start a blog covering all the steps in detail. If you have some technical expertise, you can simply refer to the summary section of the steps on how to start a blog above.
Let’s start with the step-by-step process of starting a blog or a website in detail.
Step 1: Sign up for WordPress Hosting
You will need a hosting service where you can install the blogging software and upload all the files to your blog. Hosting is the place where your blog or website files will live and will be served to anyone who requests them.

Bluehost is one of the officially recommended hosts by the WordPress and offers a one-click WordPress installation, making it really easy to start a new WordPress blog.
Exclusive Deal: Direct Link
Bluehost is offering an exclusive deal to help you get started with your first blog. Use our discounted Bluehost link to get an exclusive hosting deal for your blog.
The Bluehost discount coupon will be applied automatically to the page, offering you the best possible deal available for Bluehost anywhere on the web.

Click on the Get Started Now button to start the process.
Step 2: Choose your Blog Hosting Plan
Bluehost provides you with a few different pricing plans to choose from depending on your needs. If this is your first time starting a blog, the basic option can be the most suitable one.
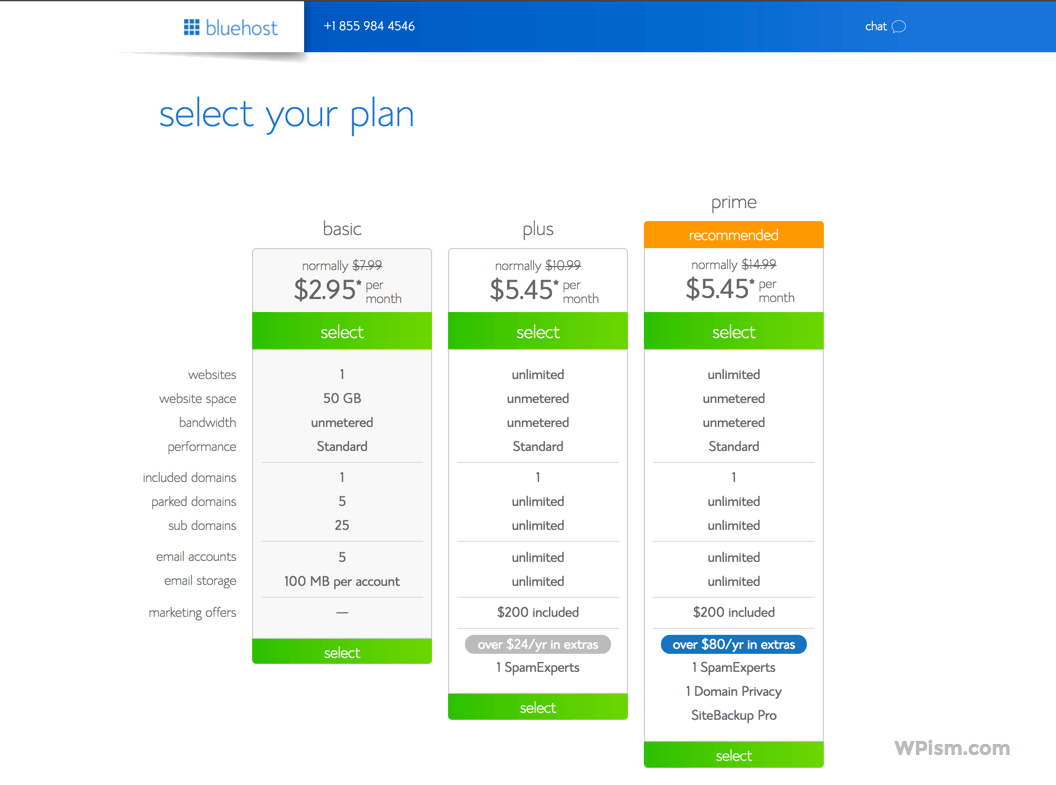
Once you have decided on the right plan for your blog, click Select the Plan to proceed ahead.
Step 3: Choose Domain Name for your Blog
Domain Name is simply the name of your blog on the web. Start by searching your desired name and see if the name is available to register.
If you have registered a domain name already using other services such as NameCheap, enter your existing domain name under the “I have a domain name’ section on your right.
You get a free domain name included with Bluehost hosting plans, so it might be worth claiming one.
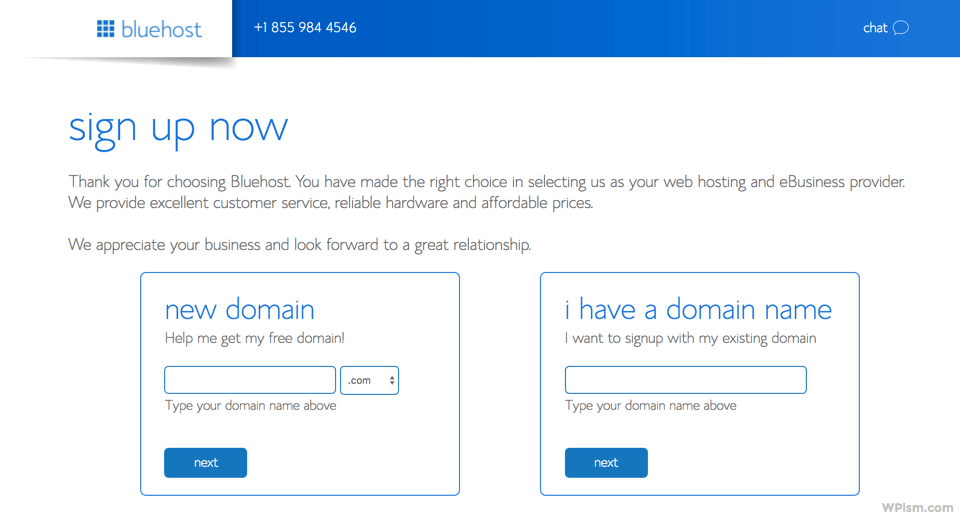
Make sure you have selected the correct extension (.com or anything you want) as per your preference if you are buying a new domain.
You can also choose a domain name later if you don’t find anything suitable immediately. Use these domain name generators later to help you find a perfect available domain name.
Choose your blog domain name and click Next to proceed.
Step 4: Create Your Blog Hosting Account
You will now need to enter a few personal details, including your billing address. This information will be used by the hosting company to create an account for you.
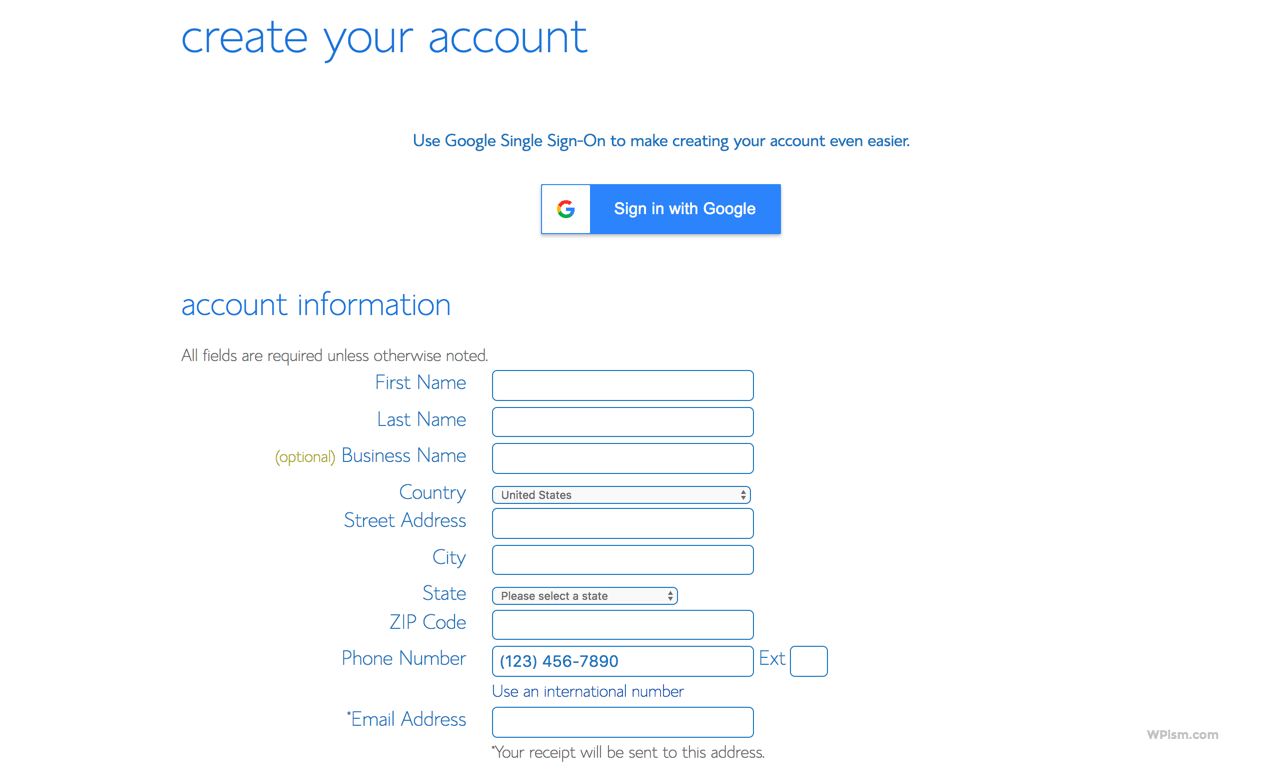
You can also sign in with your Google Account to make the process easier.
Step 5: Confirm Hosting Package Information
Make sure the right account plan is selected on this page. You can start with the Basic 12-month plan or choose the 24/36 months plan if you want to get an extended discount for the next three years. Select or deselect other options as per your requirements on this page.
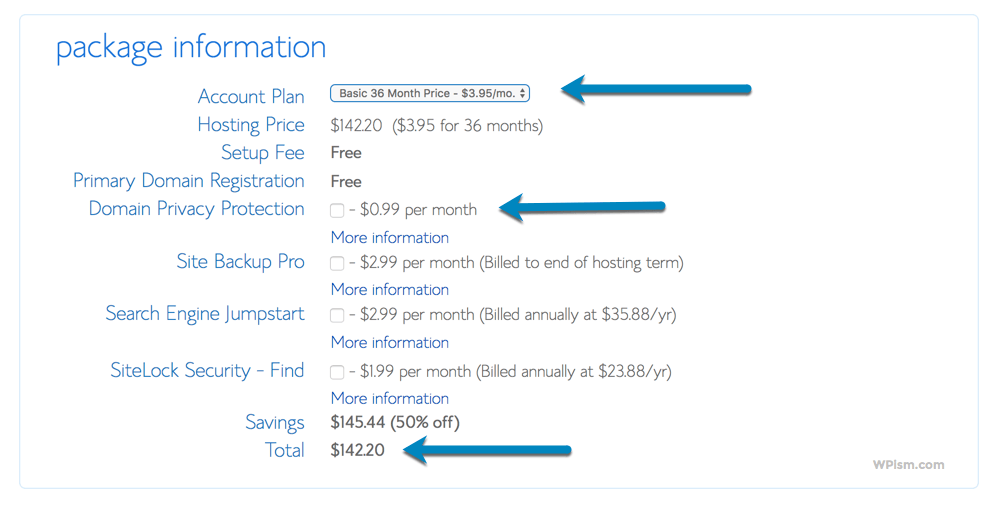
The exclusive discount won’t be available when you renew the hosting after a year. So please take some time to choose the right plan. You can see your total amount based on the plan and options that you choose at this stage.
You can see your total amount based on the plan and options that you choose at this stage.
Step 6: Enter your Payment Details
You will need to enter your billing information for the blog hosting plan that you have chosen.
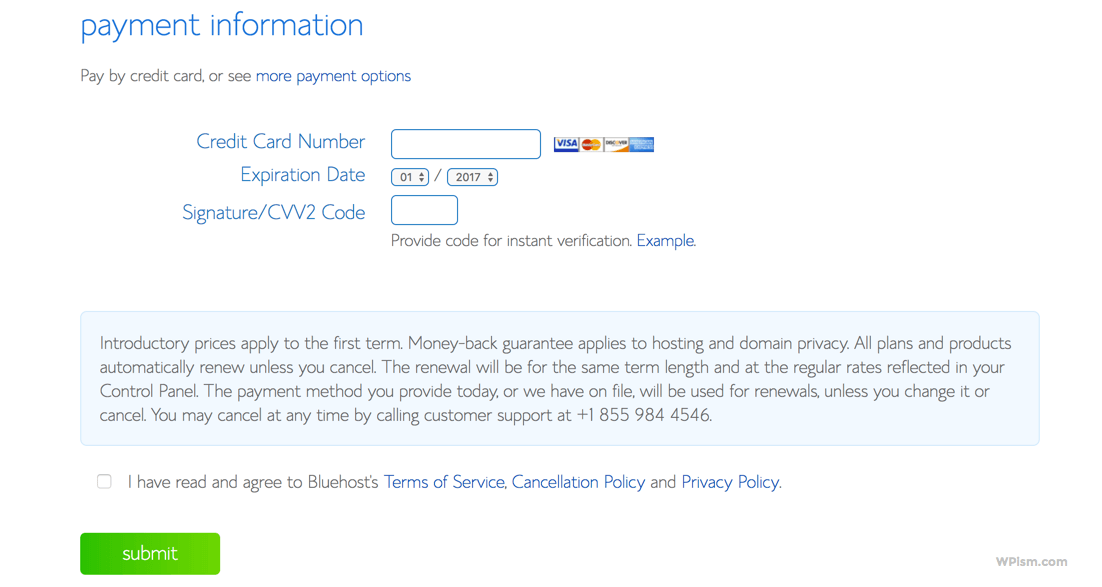
Read the fine print details and agree to the terms of service and other policies of Bluehost hosting. Check the box that you have read and agree to their terms and click on the Submit button to proceed.
Step 7: Login to your Blog Hosting Account
Bluehost will create an account for your plan and ask you to create your password if the purchase is successful.
Create your password for the Bluehost hosting account that you will need to log in.
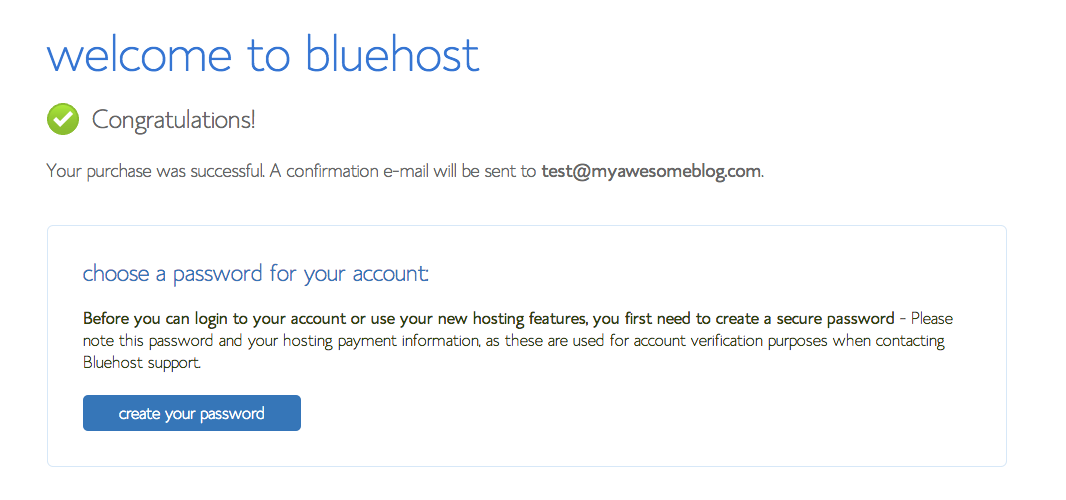
Click on Create your Password button to proceed with your account.

Make sure you set a strong password for this account. You can use the Suggest Password button to create a random strong password that you can then save at a secure place.
Check to confirm that you have read and agree to Bluehost’s Privacy Policy and Terms of Service. Click next to proceed.
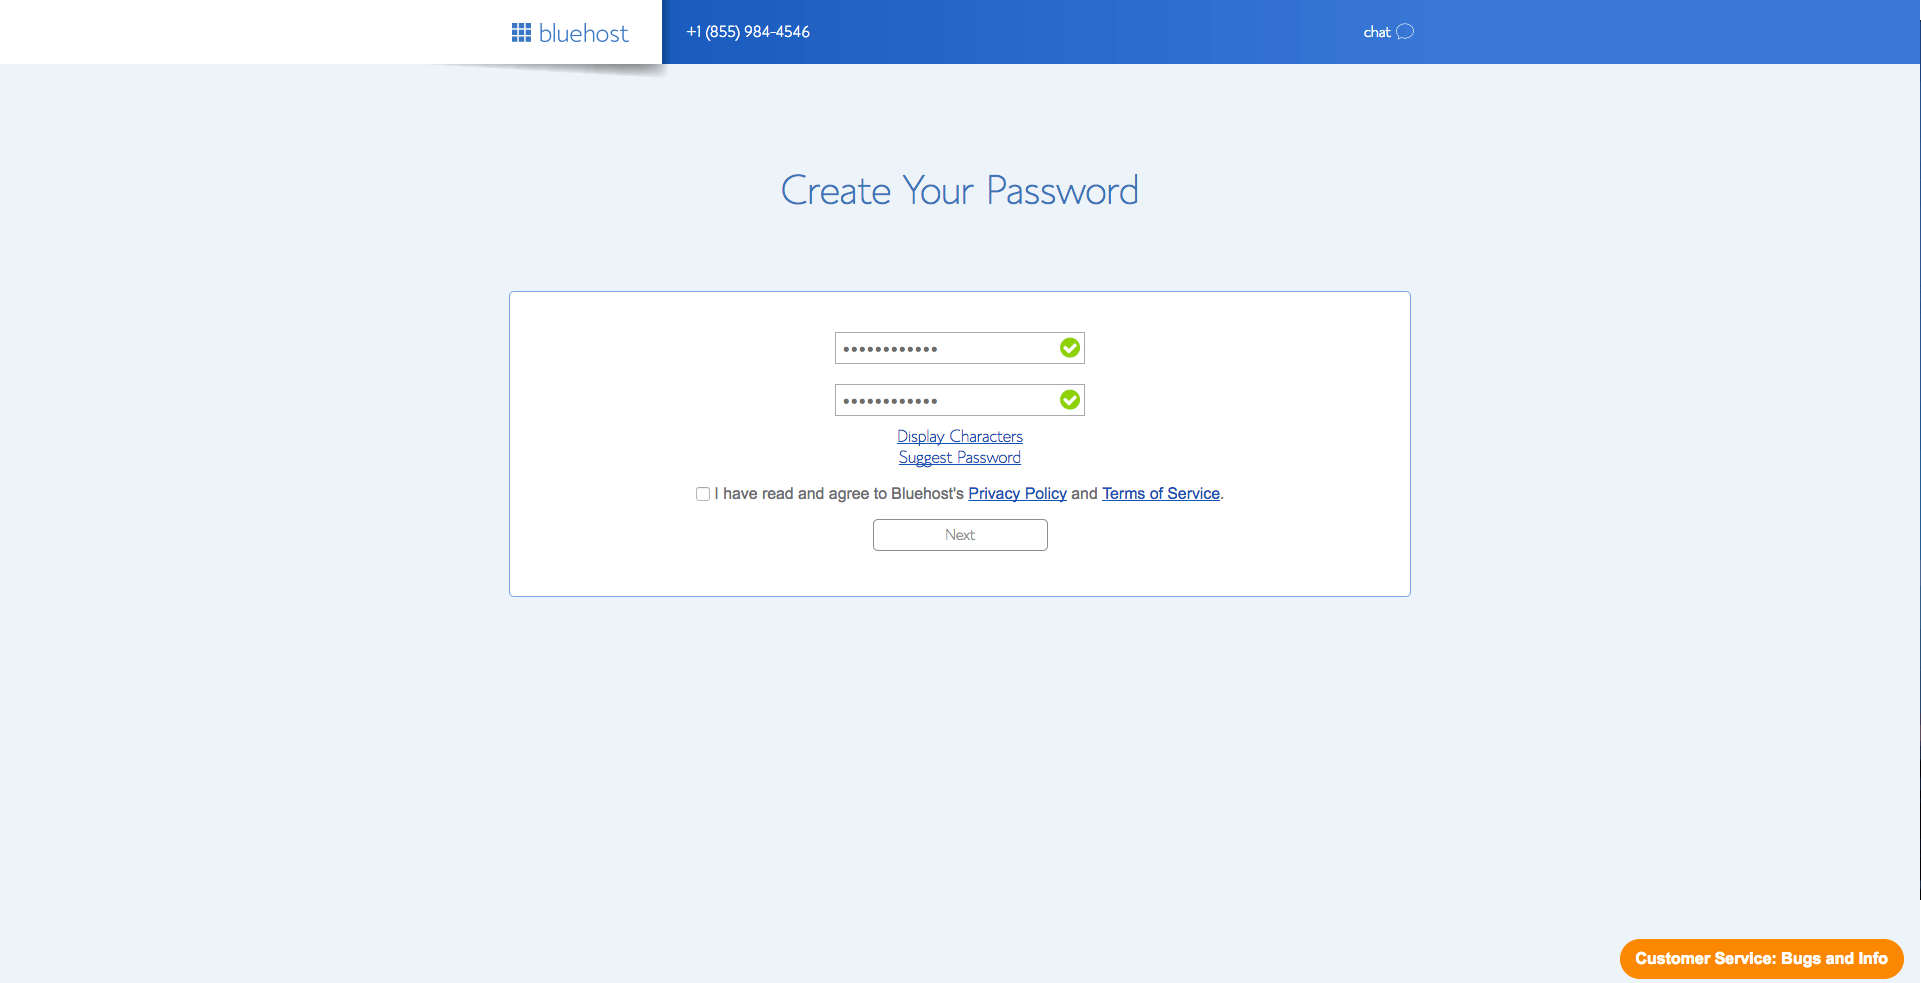
If your password is accepted, you should see a success message. Click on Login to get started.
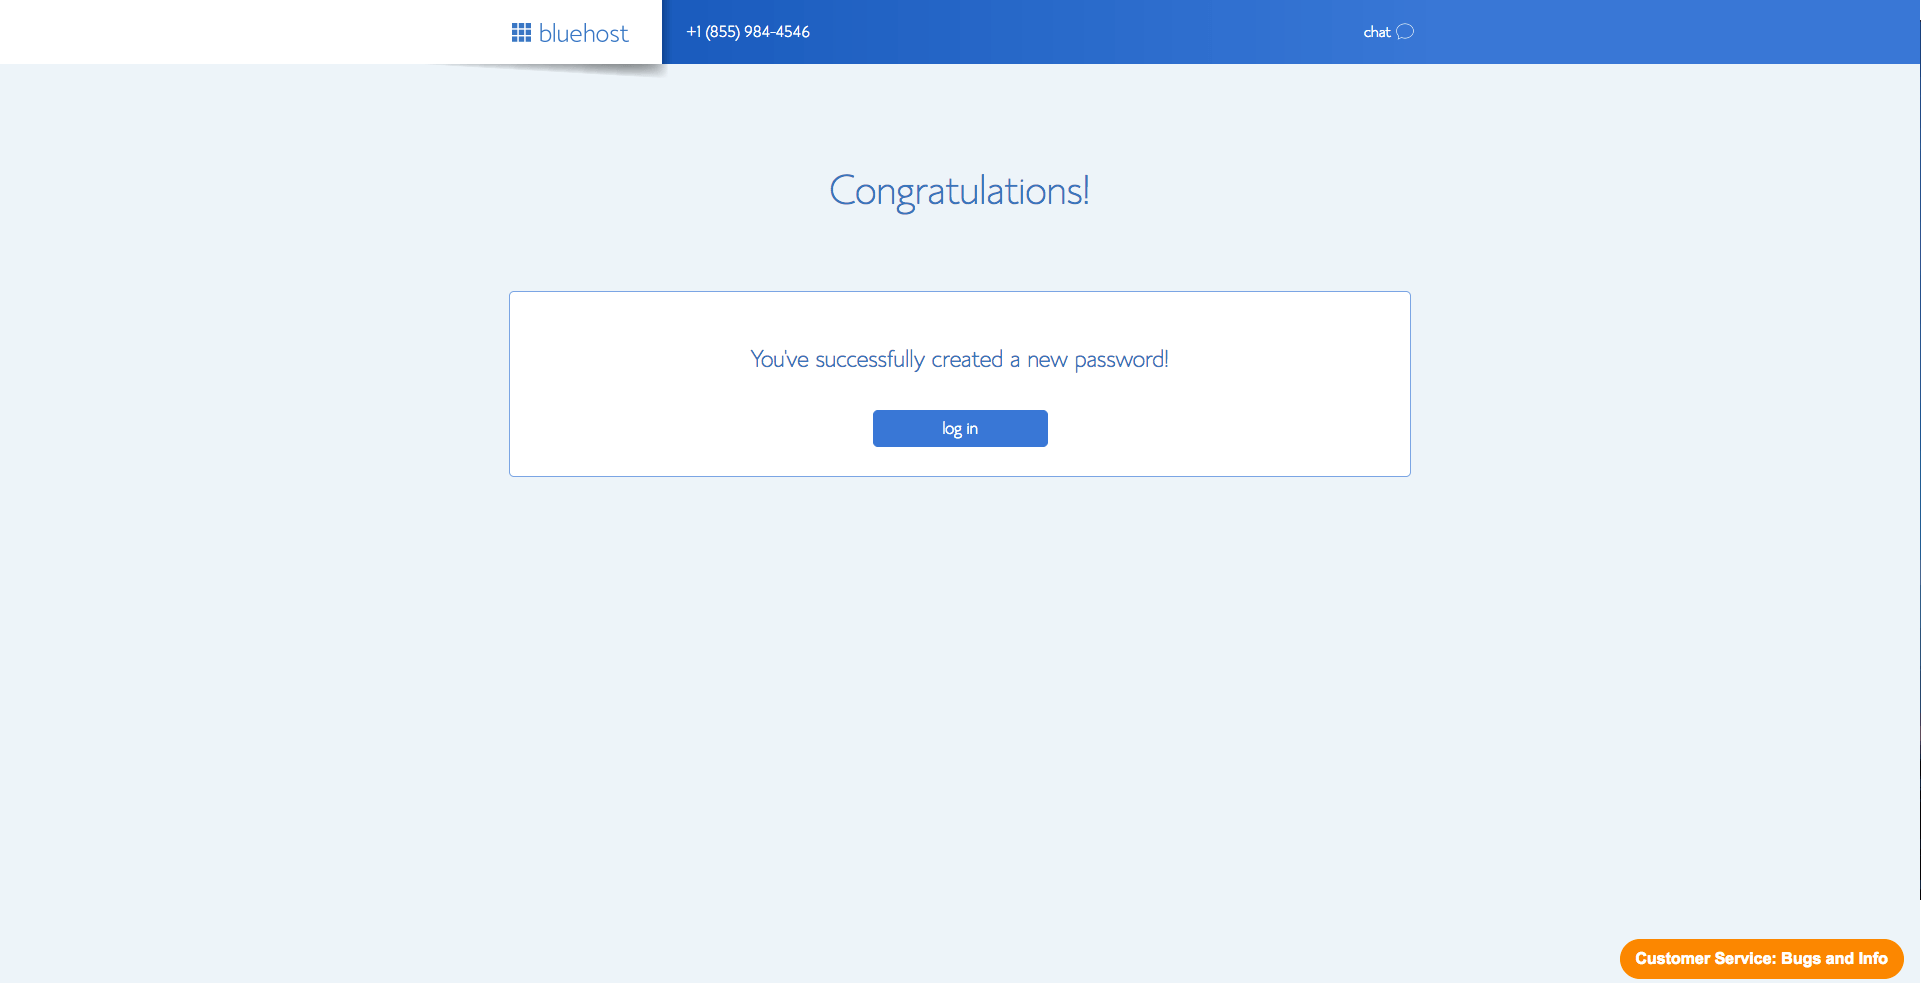
Click on Log in and Bluehost will now take you through the steps of setting up your WordPress blog.
Bluehost automatically installs WordPress on your site saving you a huge amount of time. How cool is that?
Step 8: Setup your New WordPress Blog
You will be asked you pick a theme for your blog to get started. WordPress themes help you change the looks and design of your blog.
Don’t worry if you don’t like any theme designs at this point. You can always change this later and we will see how to find good WordPress themes later in this post.
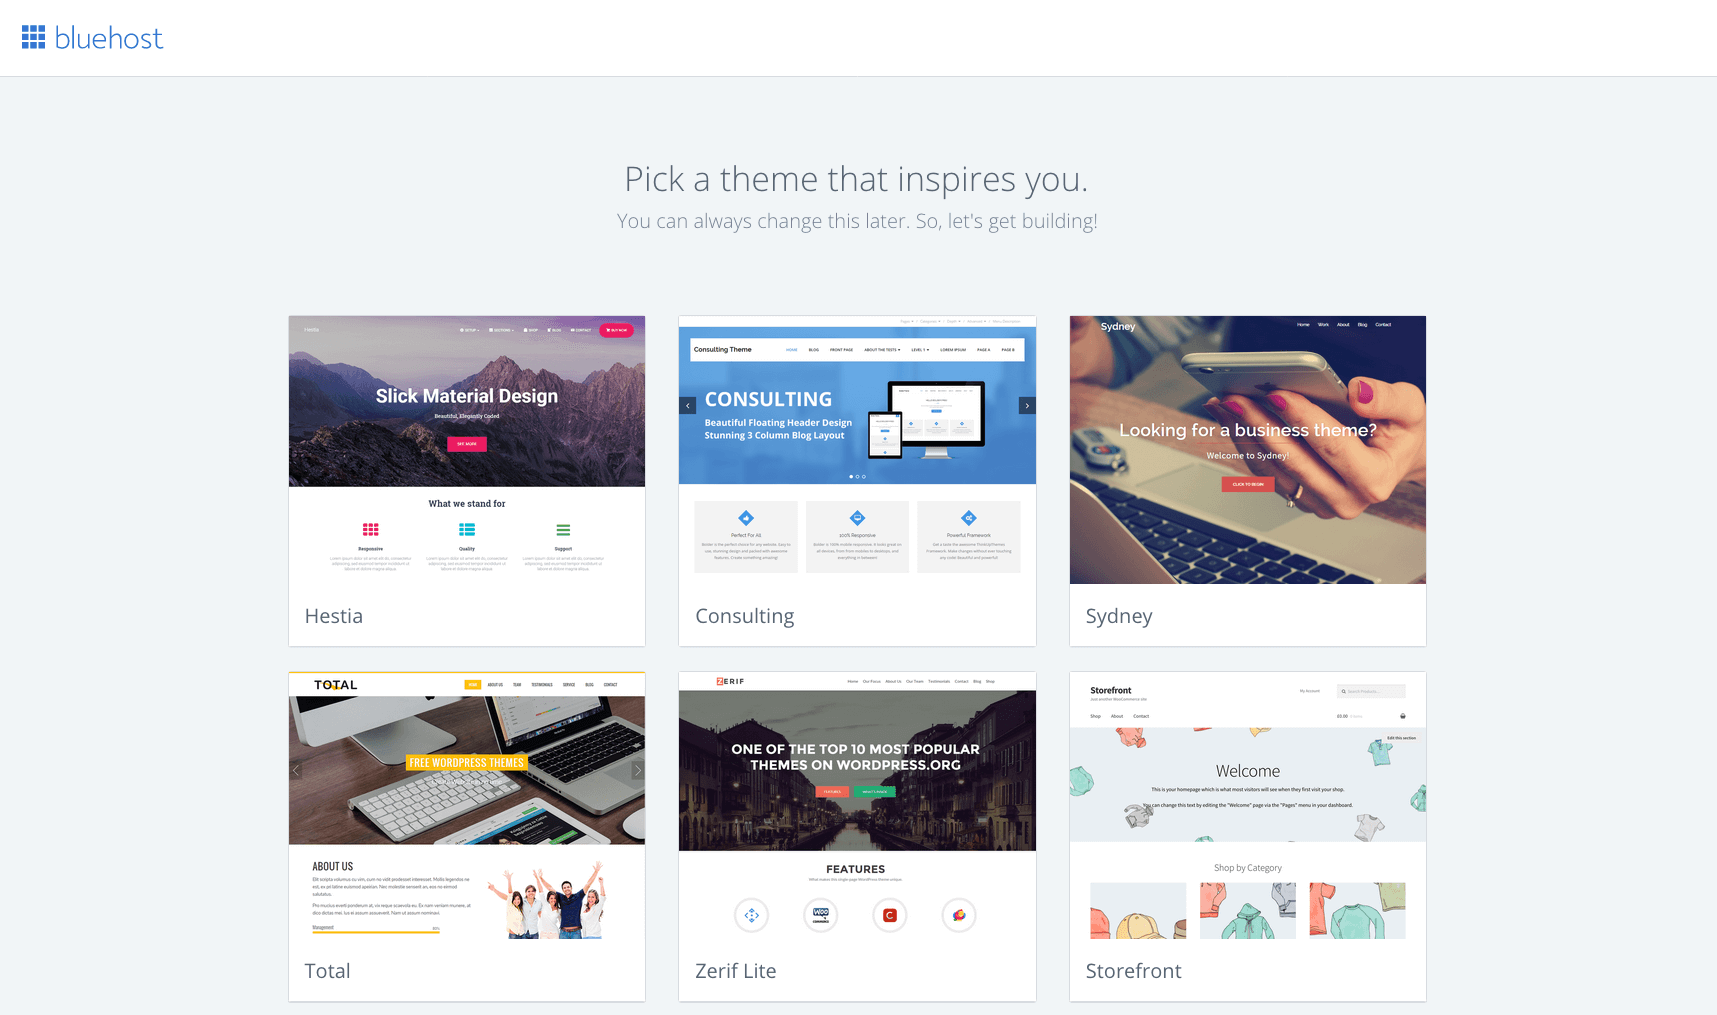
You can select “Skip this step” at the bottom to proceed without selecting a theme.
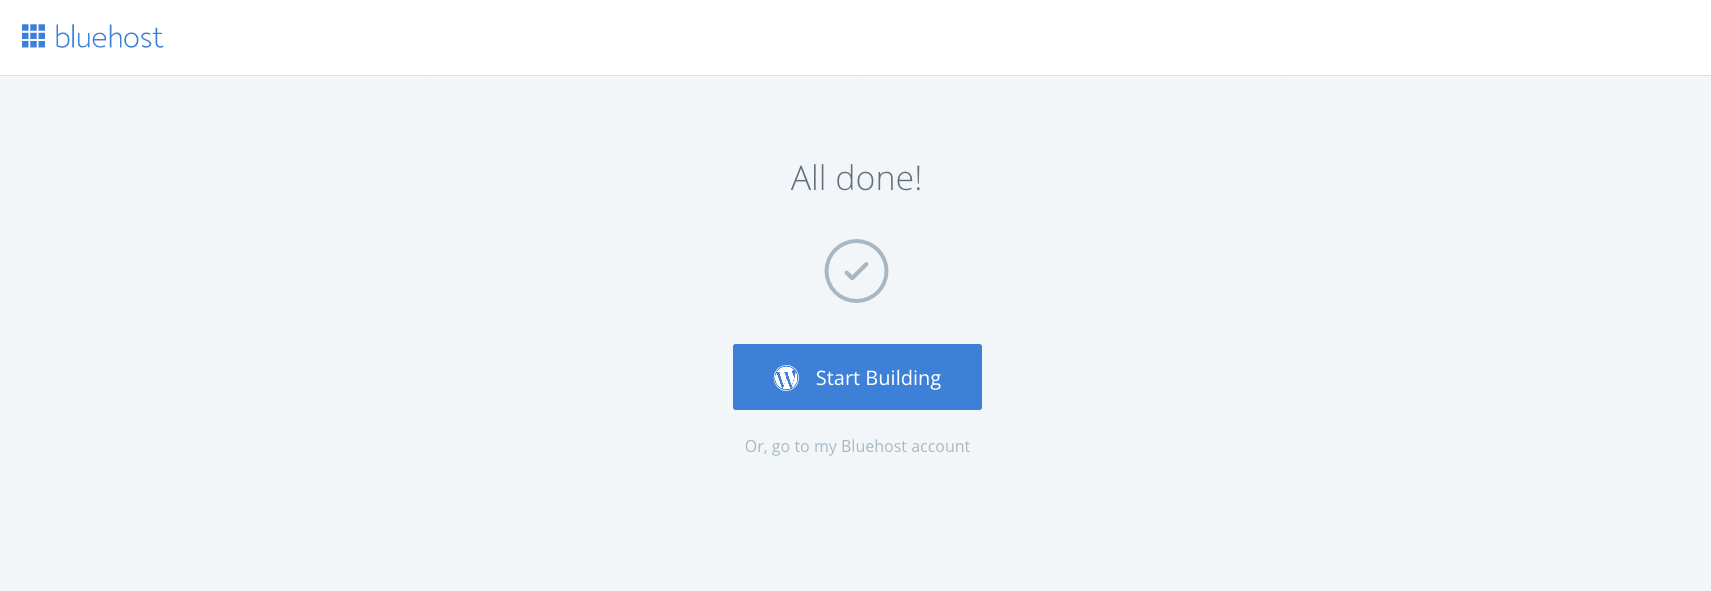
You should now see a final success message and can proceed to start building your blog. Click on Start Building to go to your newly installed WordPress Blog.
Step 9: Welcome to your New WordPress Blog
Bluehost will now welcome you to your new WordPress blog screen. You can follow along with Bluehost’s guided steps for creating the type of blog you want.
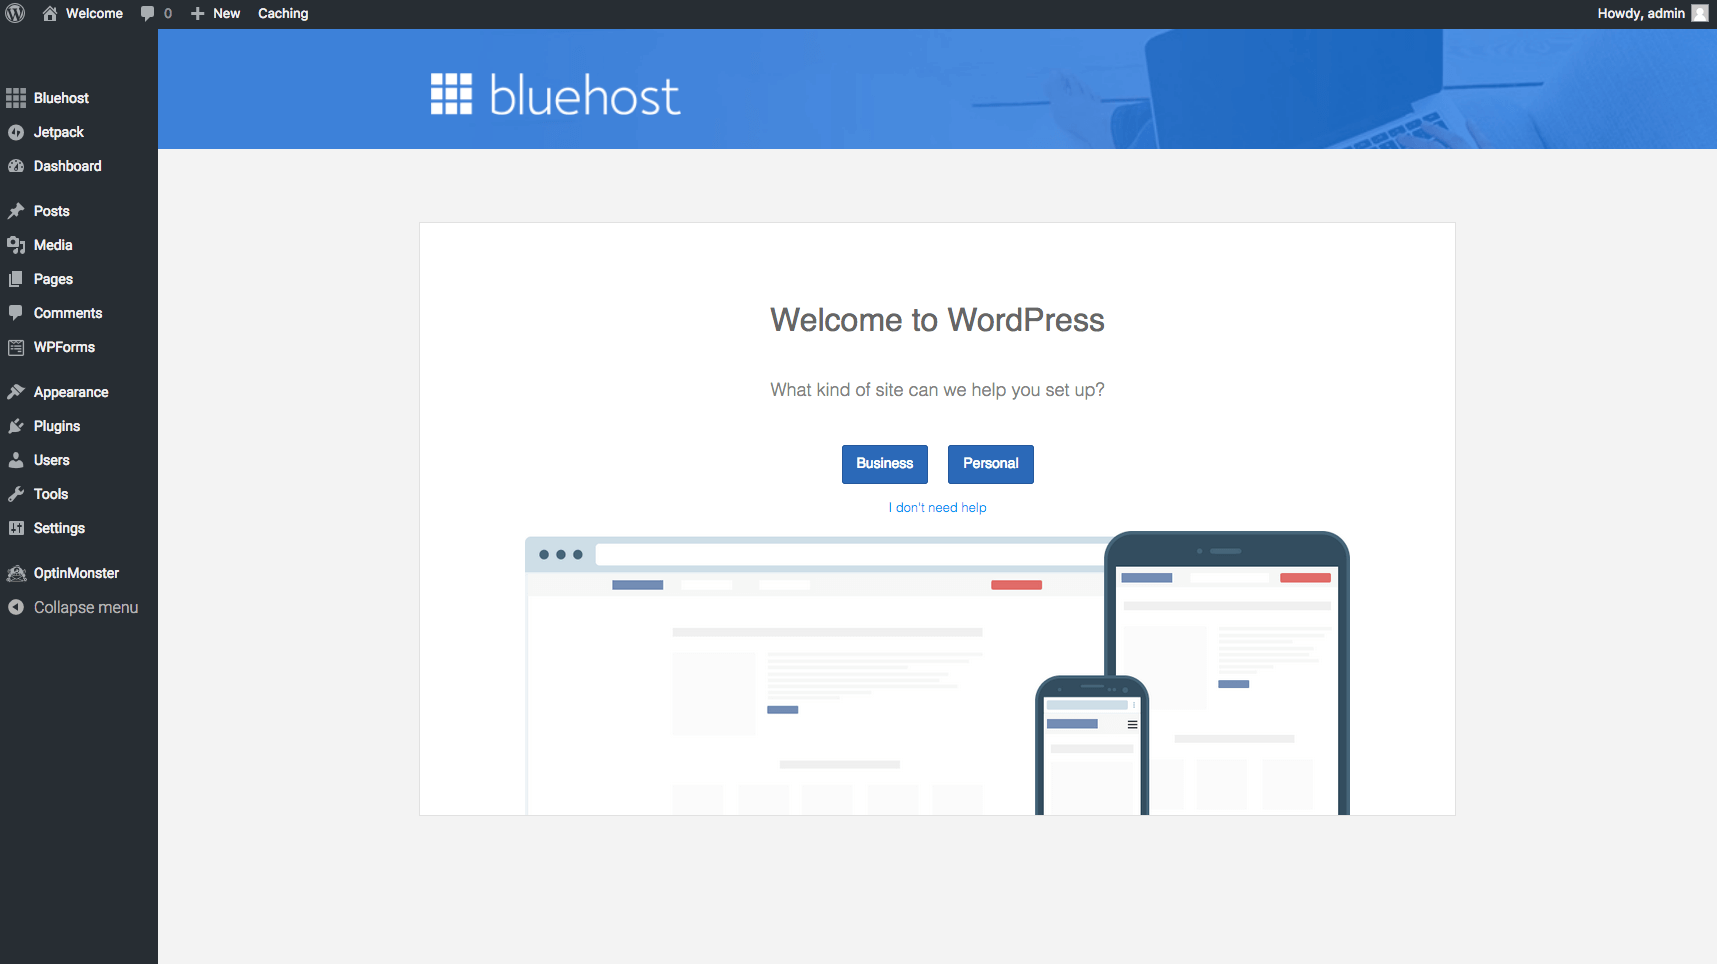
Or click the ‘I don’t need help‘ link on this screen.
Step 10: Launch your New Blog
You will now see an option to launch your new blog and make it available to everyone. Following Bluehost’s automatic installation of WordPress, your blog should be displaying a coming soon page.
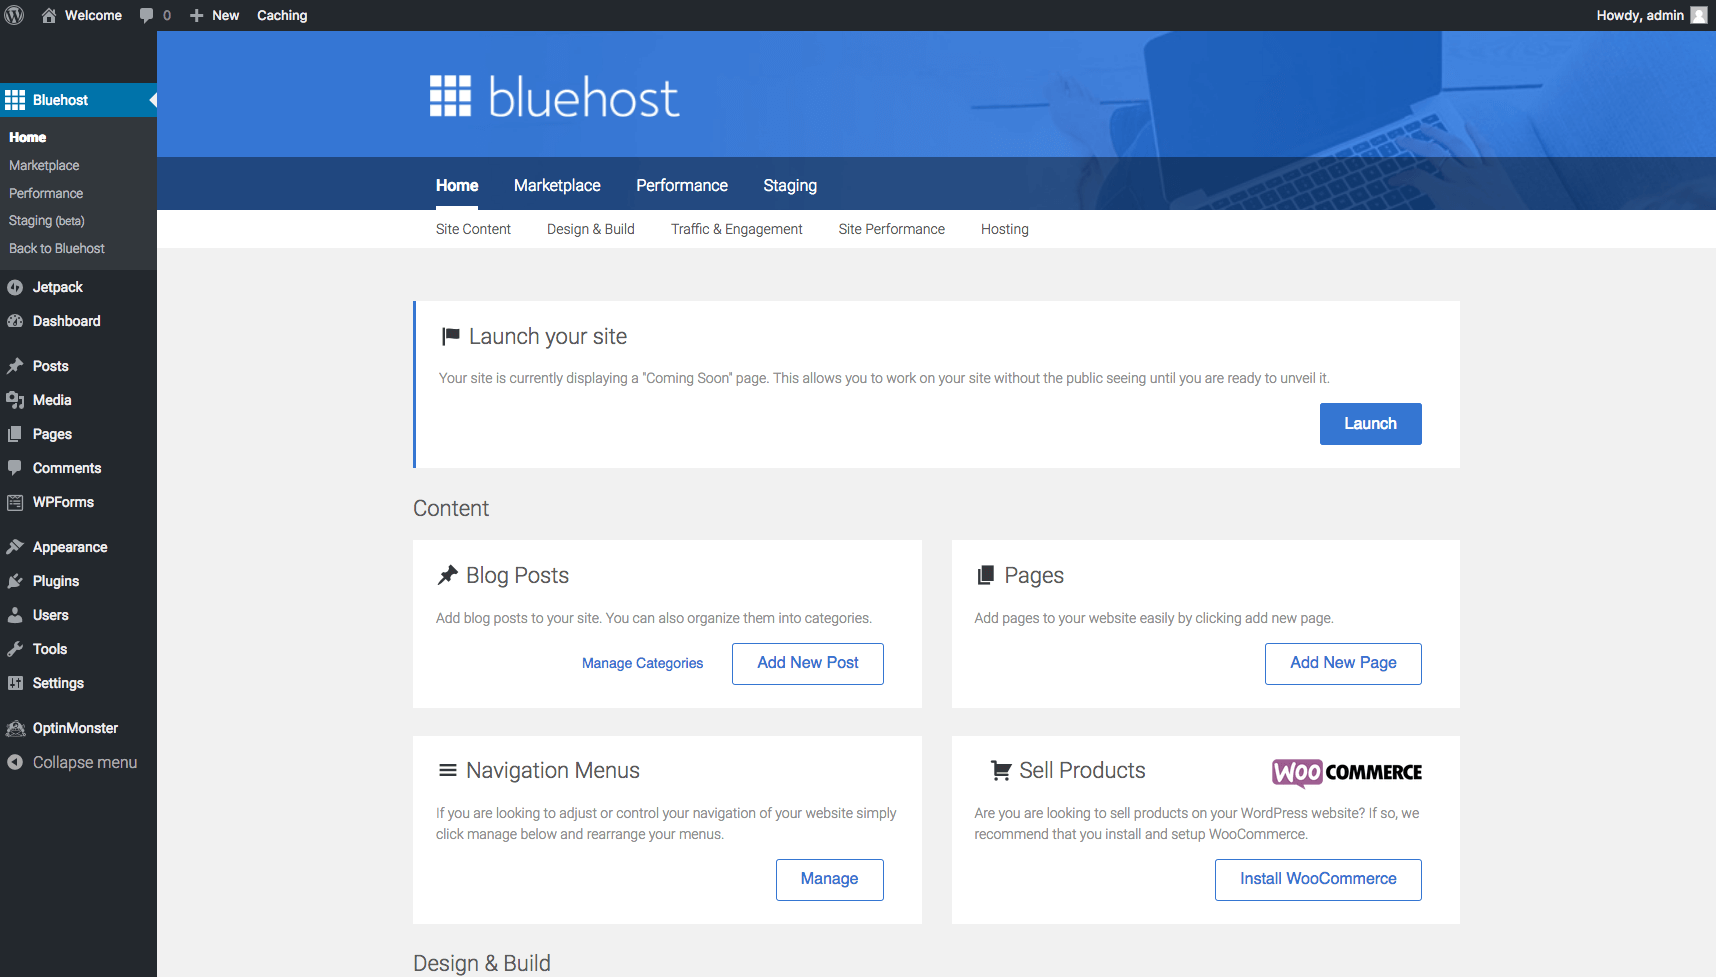
Click on the “Launch” Button to start launching your new blog.
You will be finally asked to fill in your blog title and blog description before you make it available to everyone.
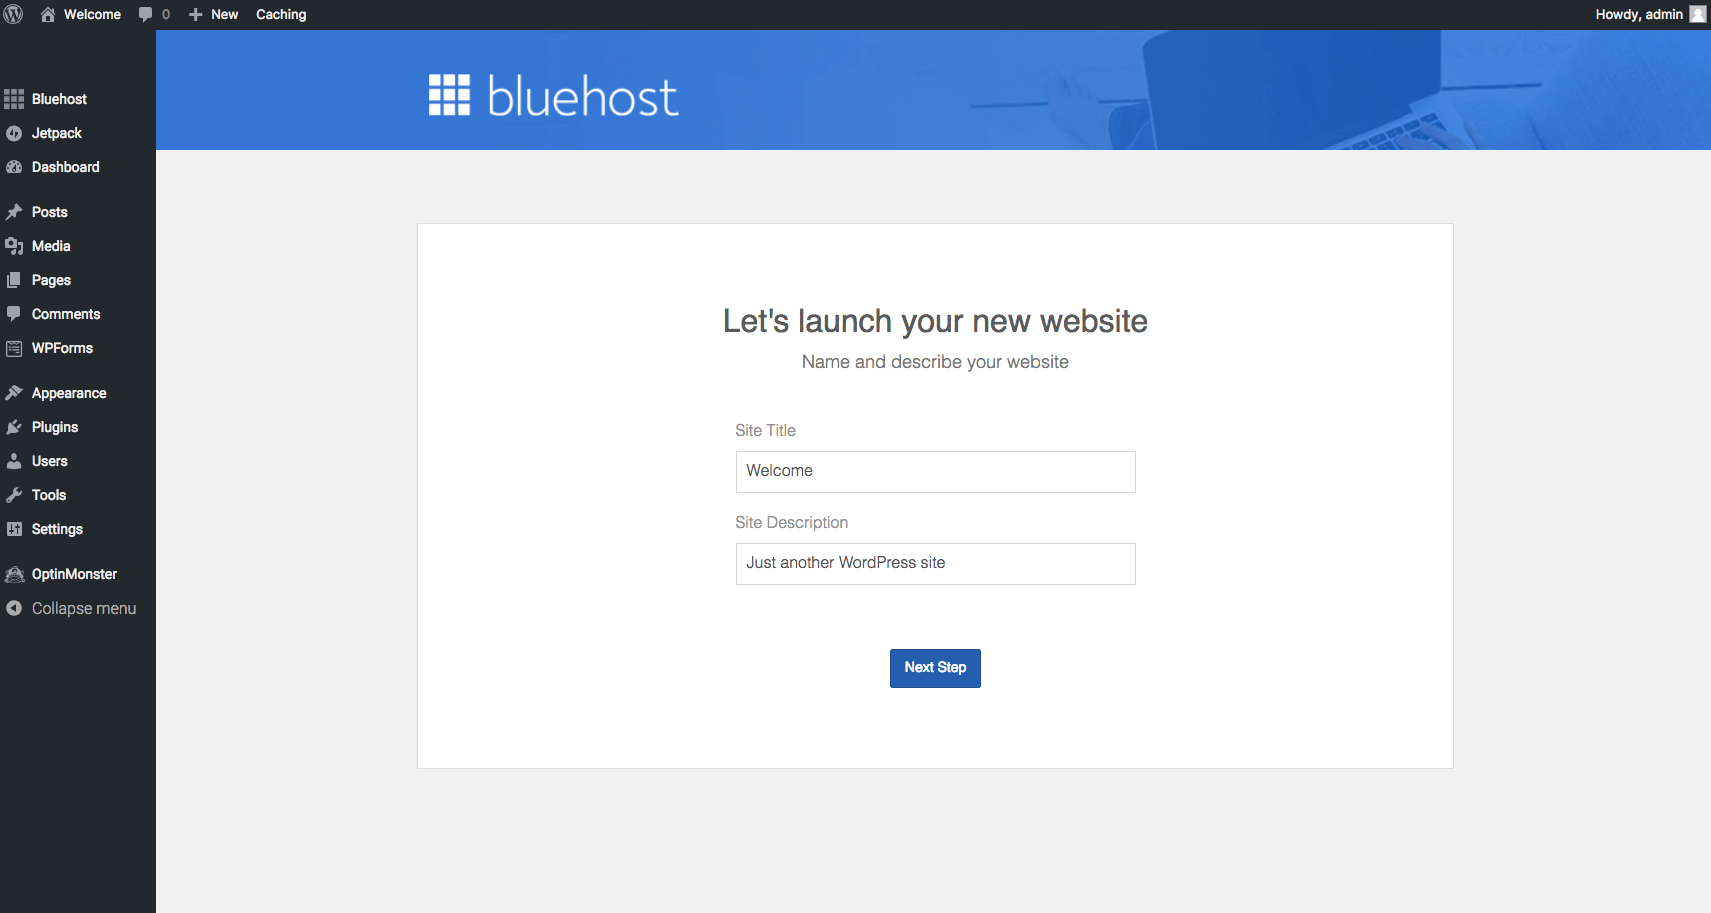
Congratulations, you now have a new WordPress Blog!
You will see a brand new WordPress admin dashboard for your blog.
Now that you know how to start a blog, you can continue learning how to change your blog design and add additional features to your blog in the rest of this guide.
Change Your Blog Design with WordPress Themes
Your new blog will have a default WordPress theme installed as part of the initial process. This will be the default WordPress theme for the year, and if you like how your blog looks, you don’t need to change it.
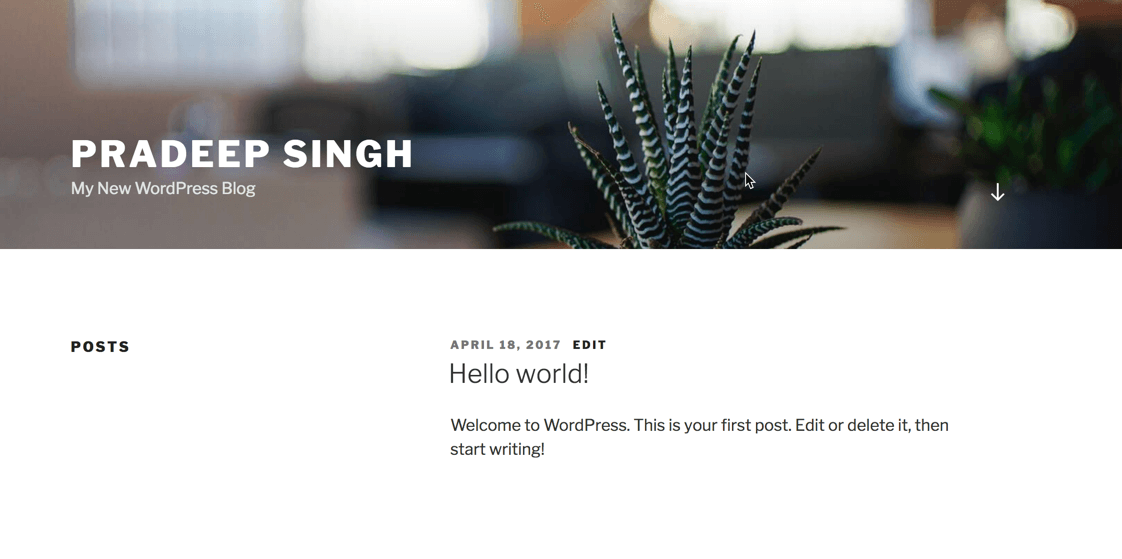
But I am sure instead of the generic design, you want a design that suits the purpose of your blog. That’s where other free WordPress themes come in.
WordPress themes help you change the design of your blog and there are thousands of such themes available to download and use for free on your blog.
To choose a new theme for your blog, navigate to the Themes section of your WordPress dashboard.
Appearance > Themes
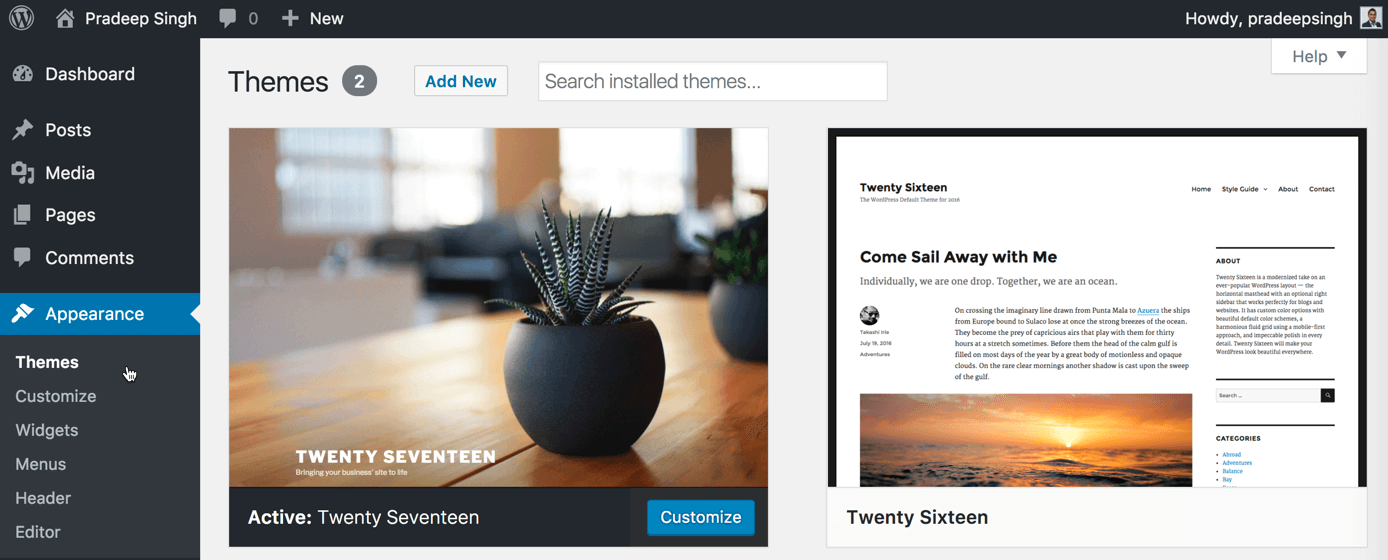
You will see your current theme and a few other themes installed on your blog already. These are all default WordPress Themes.
To select a new theme, Click on Add New on top of the page, and you will be taken to the Add Themes page.
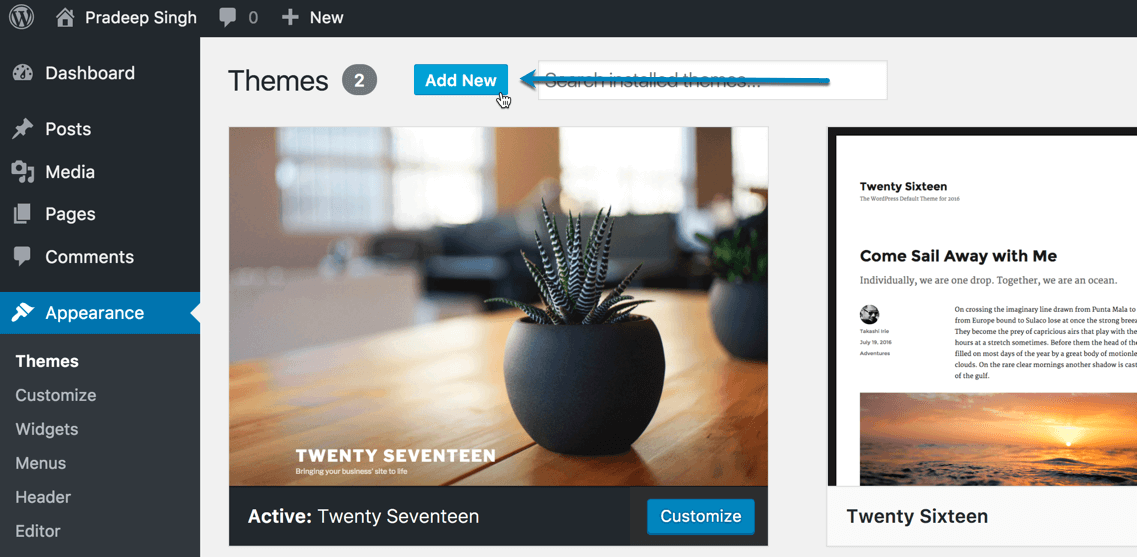
You will be presented with a selection of featured WordPress Themes that you can select from.
Browse around and click on the Preview button to see if you like the new design preview of your blog.
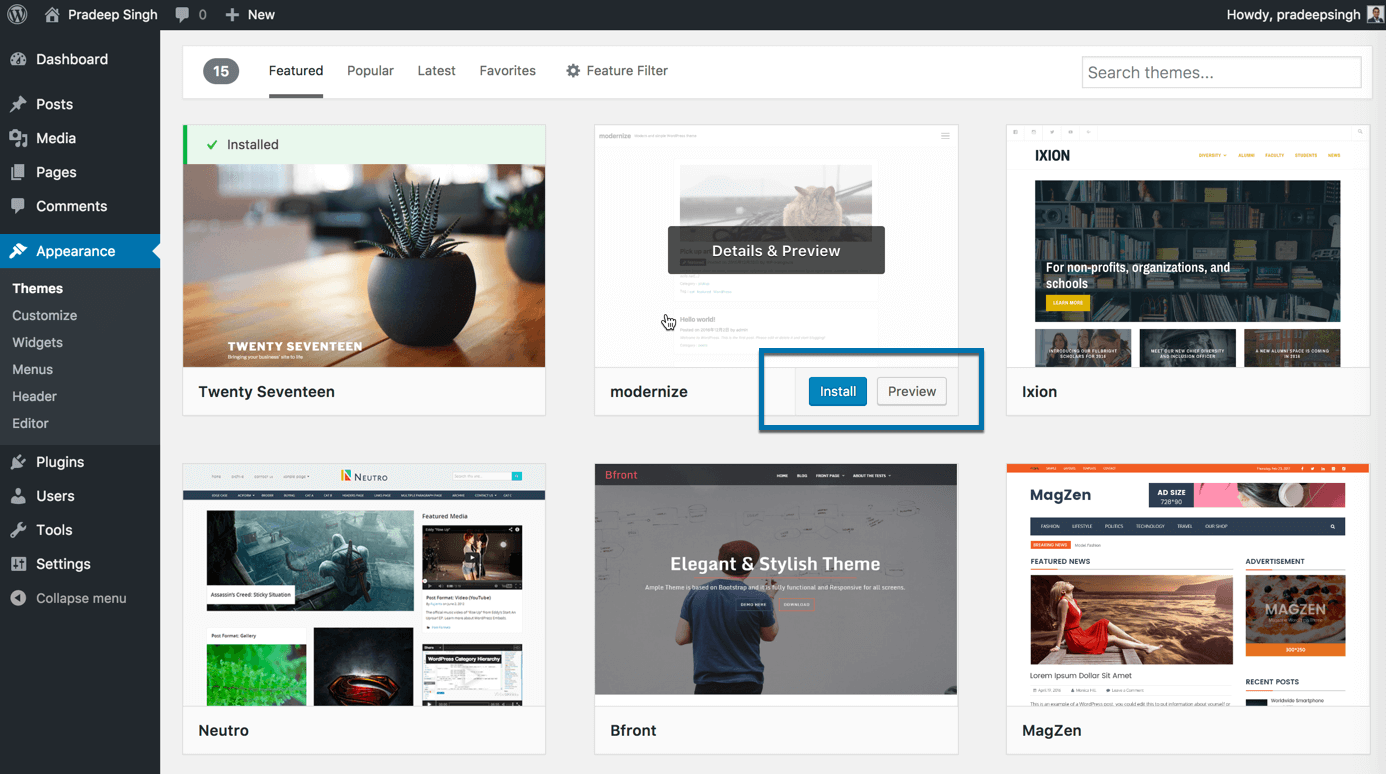
Click on the Install button on any of the themes to install and apply the WordPress theme for your blog.
Premium WordPress Themes
There are also several premium WordPress Themes available in different theme marketplaces that you can buy to install on your blog. If you are really serious about the design and functionality of your website or blog, you should consider investing in premium themes.
ThemeForest Themes
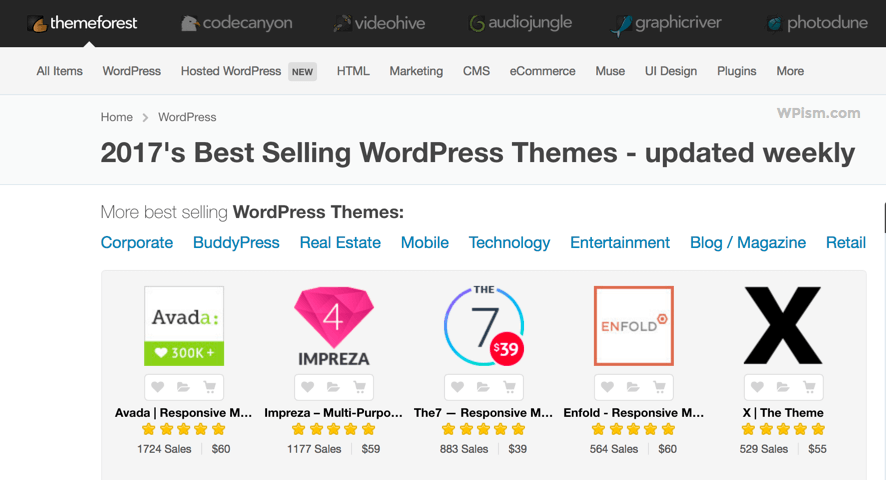
ThemeForest is one of the biggest marketplaces, and you can browse their popular WordPress themes section to find a suitable theme for your blog.
Some of the themes on their marketplace such as Avada and Newspaper have been hugely popular among WordPress users.
Genesis WordPress Themes
Another easy to get started option for your blog would be to get Genesis Themes from StudioPress. Genesis themes also have a community of their own, and StudioPress has well-built, SEO-focused premium themes.
Genesis themes on StudioPress are slightly more expensive than themes on other marketplaces but they are worth buying and you will see the difference once you start using it.
Consider it as a one-time investment for a quality product and it will save you a lot of time and money along with your WordPress journey.
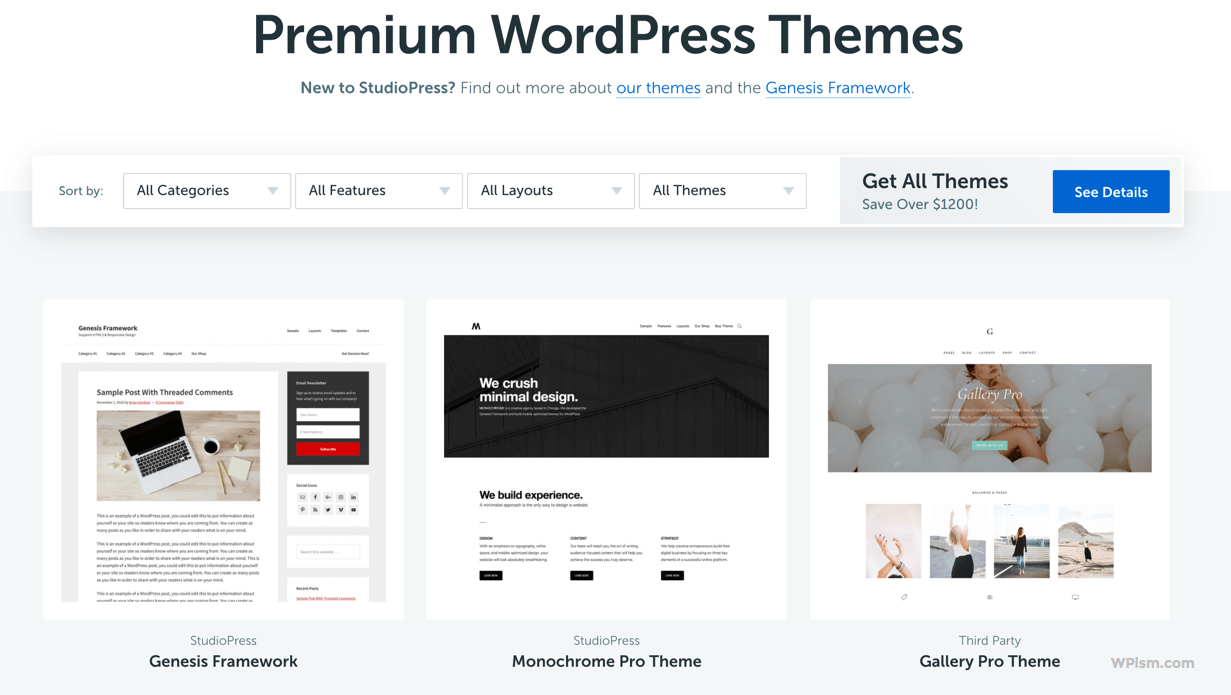
Their themes are the most recommended ones in the WordPress community and are really easy to setup and configure.
Best Settings for Your Blog SEO
Before you start writing posts and uploading images, there are a few settings that I want to recommend from an SEO perspective. It’s important to focus on SEO issues right from the beginning, and these settings can give you a head start in the right direction.
Change Blog Permalinks to SEO-Friendly Structure
Go to Settings > Permalinks from your WordPress dashboard and change the Permalink settings to Post name.
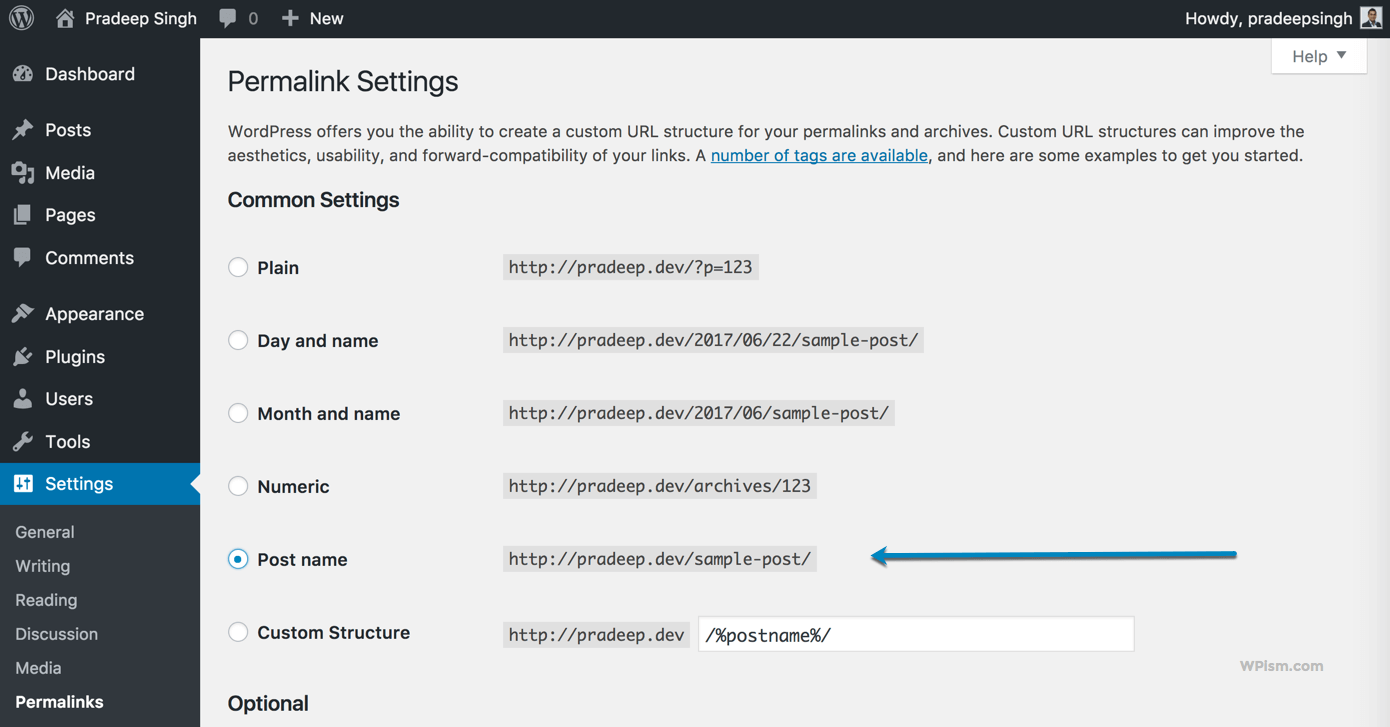
By default, WordPress uses an ugly Day and Name or plain Permalink structure. Post name permalink structure is simple, clean and the best structure recommended from an SEO perspective.
Change your Blog Title and Tagline
Go to Settings > General from your WordPress dashboard and make sure you have the right information for the Site Title and Tagline instead of the default “Just another WordPress site”.
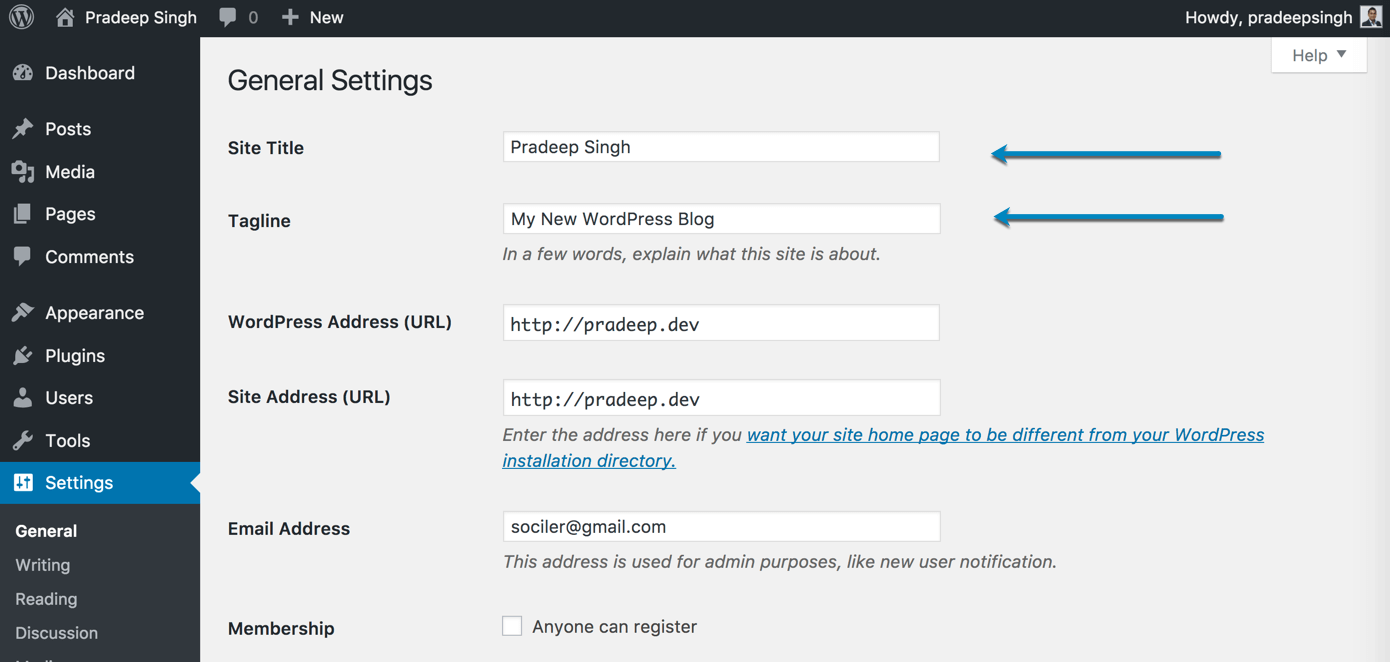
Site Title and Tagline will be shown in the search engines when people search for your blog name and so, it’s essential to double-check and update them accordingly.
Moderate Spam Comments on Your Blog
You will, unfortunately, get a lot of spam comments on your WordPress blog and, therefore, need to make sure they don’t appear on your blog. You can choose to moderate all the comments that appear on your blog.
Go to Settings > Discussion and make sure the checkbox for Comment must be manually approved is checked.

Extend Blog Functions with WordPress Plugins
If you want additional functionalities on your WordPress blog, you will need to install WordPress plugins.
Similar to Themes, there are thousands of plugins available for free on the WordPress repository.
From your WordPress dashboard, go to Plugins > Add New to search and install new plugins for your blog.
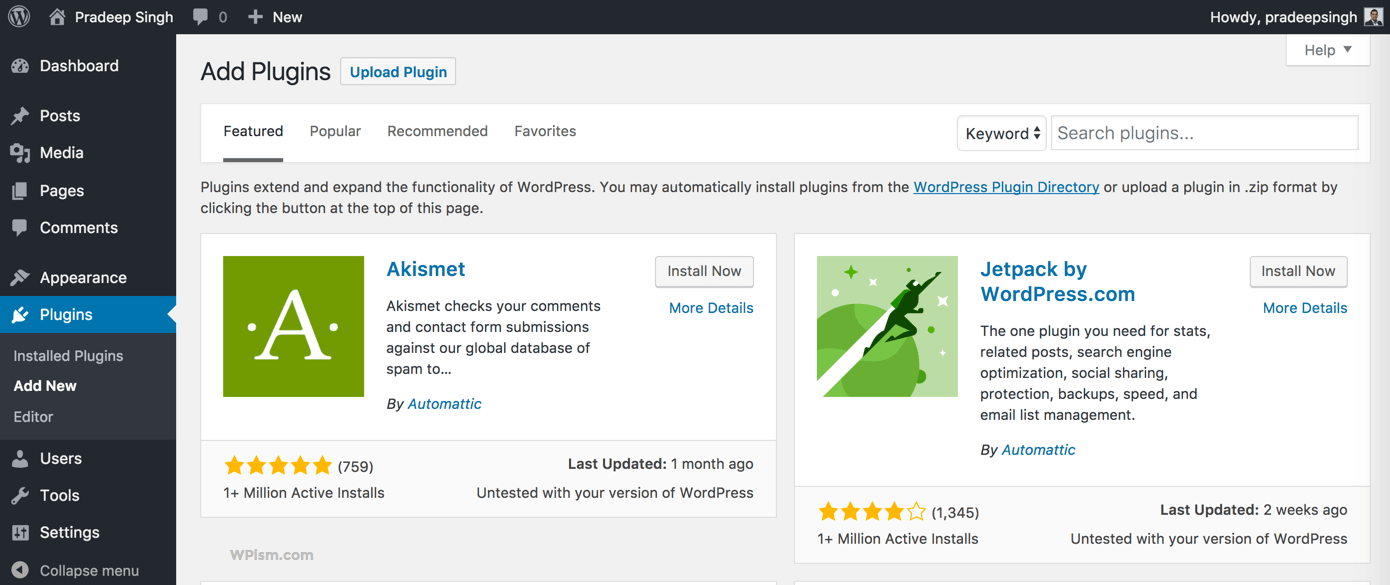
You will be presented with the featured section with some of the most popular plugins available in the repository.
Along with your blogging journey, you will learn to search for appropriate plugins depending on your needs but here are some of the general plugins that might be a good starting point.
Akismet WordPress Plugin
You will find the Akismet plugin installed by default, and you just need to activate it for your blog. The plugin solves the huge spam problem of WordPress blogs.

To activate installed plugins go to Plugins > Installed Plugins and click on Activate below the respective installed plugins listings.
There might be a few situations where this might not work 100% effectively, but you can easily look for other alternative ones such as the Antispam Bee plugin that will work for your blog.
Yoast SEO Plugin for WordPress Blogs
If you are concerned about SEO and want to drive more traffic from search engines, Yoast SEO is the must-have plugin.
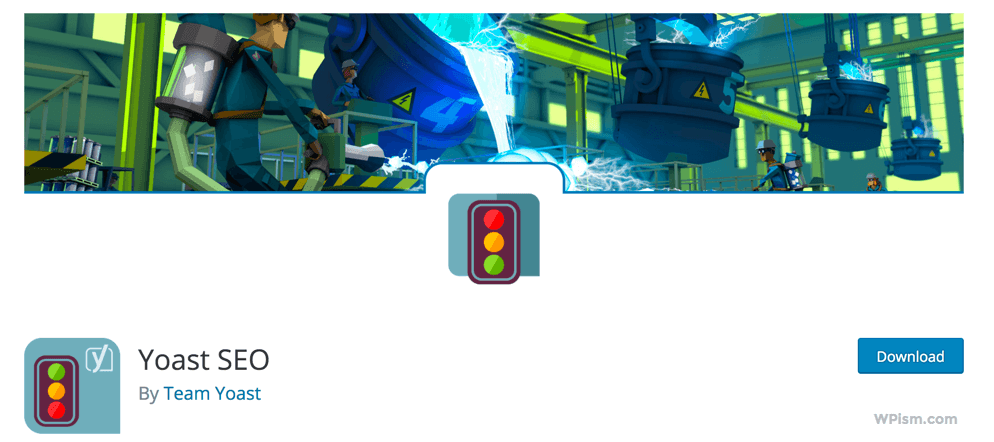
Search for Yoast SEO from Plugins > Add New
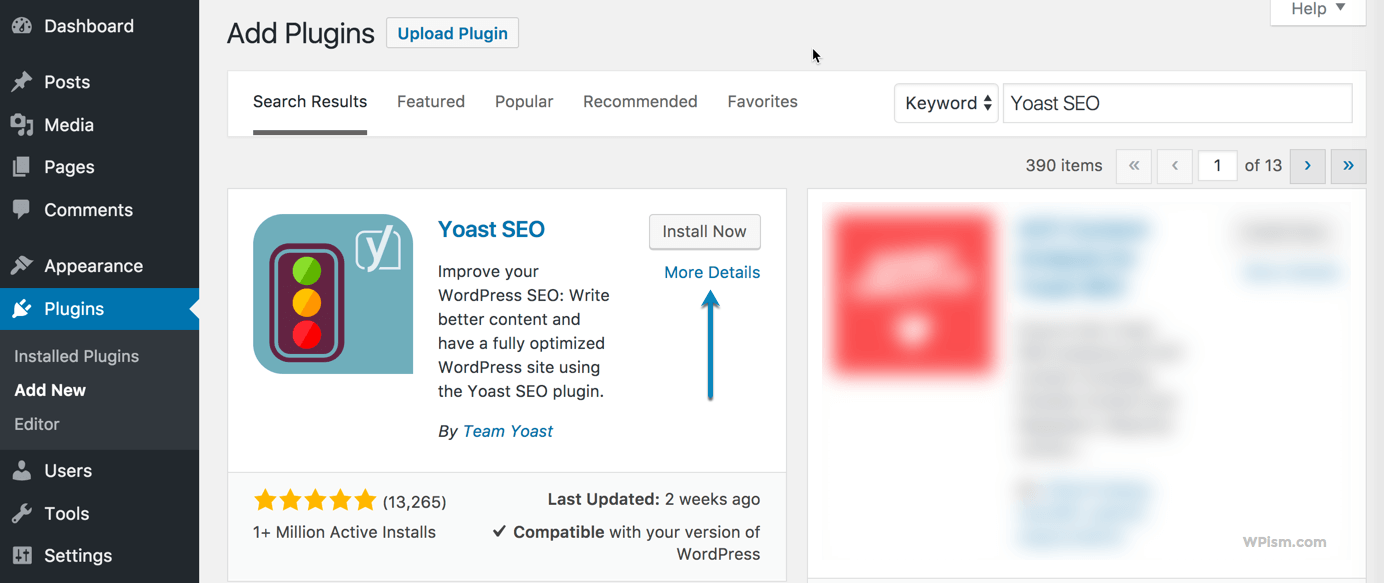
Install the plugin and follow the configuration process that lets you define all necessary settings for your blog.
Start Blogging – Create Content – Posts / Pages
Content should be the top priority of your blog. Now that you have everything configured, it’s time to start blogging by creating posts and pages on your blog.
Create About and Contact Pages
Almost all blogs and websites have About and Contact pages. Start creating a page about you and a page with your contact details (ways your blog visitors can get in touch with you).
To create a New Page, navigate to the Pages section from the left-hand side menu on your WordPress dashboard. Click on Add New, and you will see the WordPress editor for your pages.
Pages > Add New
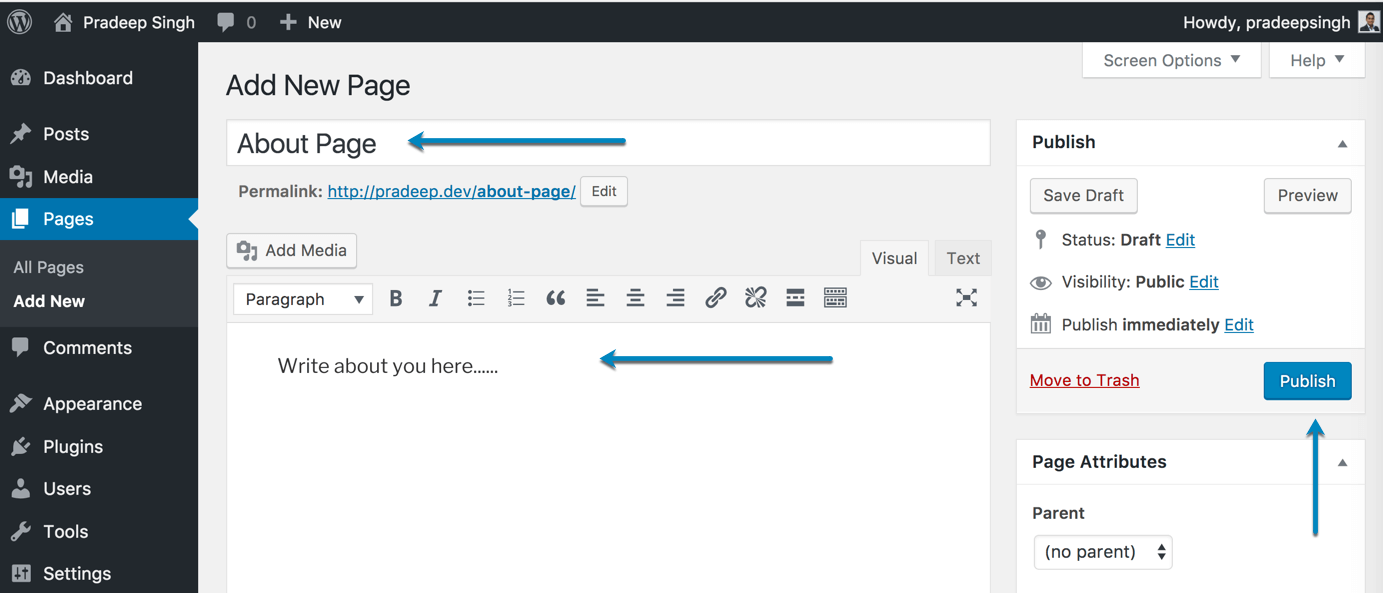
Enter your title, write the content using the editor, and when you are done, hit Publish on your right sidebar.
Start writing Blog Posts
Once you have basic pages, it’s time to start writing actual blog posts.
Don’t get confused between pages and posts as both of them look very similar. Think pages as long-term content and posts as your regularly updated blog posts.
To create your first blog post, click on the Posts section from the left-hand side menu on your WordPress dashboard. Click on Add New to open the editor for WordPress posts and start publishing!
Posts > Add New

Enter your Title, and content and hit Publish when you are done.
Final Words on Starting a Blog
I hope this guide on how to start a blog was helpful and that you are able to create your first blog.
If this looks too technical for you, just use our free WordPress blog installation service, and we will install WordPress with the best settings completely free of charge for you.
You can also contact me if you need any further help in starting your blog. Let me know if you have any queries below.


Hi Pradeep, can I ask which SEO keyword tool do you use? Thanks!
Hi Artur,
I mainly use SEMrush and happily recommend them – https://go.wpism.com/semrush
Let me know if you find it useful.
Ho can I pay for bluehost and Godaddy payment from Nepal.
Hi Bikash,
I guess you can use PayPal from there.
purchasing web hosting and full domain is how much important for new bloggers.
Thanks. I was finding the tips about starting a blog and then find your post. I have a question can we use self-made templates in wordpress
Hey Pradeep,
Thanks a lot! I have tried to create a blog for a while now to no avail.
Your article is really helpful and easy to understand.
I own a self-hosted WordPress blog now, thanks once again.